

What to Plant in March: A Nationwide Guide to Kickstart Your Garden
March is that sweet spot between winter and spring when the garden starts waking up, and it’s the perfect time to get your hands in the dirt. Whether you’re itching to start your veggie patch or want to add some color to your flower beds, what you plant now will set the tone for the growing season ahead. From cool-weather crops like leafy greens and peas to early flowers that thrive in the spring chill, here’s what to plant in March to give your garden a strong start.
March is the month when gardening truly starts to come alive! Whether you're in a frost-prone northern state or a mild southern climate, there are plenty of hardy vegetables, fruits, and herbs that can be planted now. No matter where you live, this guide will help you get your hands in the dirt and your garden growing!
Cold Climates (Zones 3–6): Cool-Weather Champs
If your ground is starting to thaw but frost is still possible, focus on frost-tolerant crops that thrive in cooler temperatures.
Vegetables:
Peas – One of the best early spring crops, peas can handle frost and thrive in cooler temperatures.
Carrots – Sow seeds directly into the soil for a sweet early summer harvest.
Radishes – Fast-growing and frost-hardy, radishes are a perfect first crop of the season.
Spinach & Lettuce – These greens thrive in cool weather and can handle light frosts.
Onions & Garlic – If you didn’t plant in the fall, early spring is your last chance for a good harvest.
Fruits & Herbs:
Strawberries – Get bare-root plants in the ground for summer berries.
Chives & Parsley – These cold-hardy herbs can withstand frosty nights and come back year after year.
Mild Climates (Zones 7–9): Transitioning to Warm Weather
Gardeners in these zones can start transitioning to warm-weather crops while still enjoying cool-season staples.
Vegetables:
Beets – Great for early spring planting, beets grow well in moderate temperatures.
Cabbage & Broccoli – These brassicas love the mild March temperatures.
Potatoes – Start your potatoes now for a late spring/early summer harvest.
Lettuce, Kale & Swiss Chard – Greens do well before summer heat sets in.
Tomatoes & Peppers (Start Indoors) – While it’s too early to plant outdoors, starting seeds inside now ensures strong plants later.
Fruits & Herbs:
Raspberries & Blackberries – Get your berry bushes in the ground now.
Thyme, Oregano & Cilantro – These herbs enjoy the mild spring temperatures.
Lemon Balm & Mint – Hardy and perfect for spring planting.
Warm & Tropical Climates (Zones 10–12): Time for Heat-Lovers
Gardeners in warm climates can take full advantage of early heat-loving crops.
Vegetables:
Tomatoes & Peppers – March is the perfect time to plant these warm-weather favorites.
Cucumbers – Get them in the ground now for a fast-growing, early summer crop.
Corn – If you have the space, plant corn now to harvest in early summer.
Eggplant & Okra – These crops thrive in the heat and do well when planted now.
Fruits & Herbs:
Melons – Cantaloupe and watermelon love warm soil and longer days.
Basil & Dill – These herbs thrive in warm temperatures and can be harvested throughout the season.
Avocado Trees – If you’ve been thinking about planting an avocado tree, now is a great time!
Container & Indoor Gardening: Anyone Can Grow!
If you're short on space or dealing with unpredictable weather, you can still grow fresh produce!
Lettuce, Spinach & Microgreens – Easy to grow in containers or indoors under grow lights.
Tomatoes & Peppers – Start these in pots to move outside when temperatures warm up.
Herbs (Basil, Cilantro, Thyme, & Mint) – Perfect for windowsills or patio pots.
Final Tips for March Gardening Success:
Check Your Frost Dates – Know when your area’s last frost date is before planting tender crops.
Start Seeds Indoors – Tomatoes, peppers, and eggplants need a head start in most climates.
Mulch & Protect Young Plants – Use row covers or mulch to shield plants from unexpected cold snaps.
Water Consistently – As temperatures warm, your plants will need more hydration.
Sign up for a FREE Seedtime Account - Seedtime uses your geographic location to find your grow zone and when to plant your seeds! If you want $5 in FREE seeds AND to try Seedtime for 30 days absolutely FREE, head to my post The Best Gardening App You Need.
March is an exciting month for gardeners, no matter where you live! Whether you’re sowing cold-hardy greens up north or starting tomatoes down south, there’s something for everyone to plant right now. What are you growing this March? Let me know in the comments!

Why Old-Fashioned Homemaking Skills Matter More Than Ever
In a world that moves at lightning speed, there’s something deeply grounding about old-fashioned homemaking skills. Knowing how to bake from scratch, grow your own food, and mend what’s broken isn’t just about nostalgia—it’s about self-sufficiency, resilience, and reclaiming a slower, more intentional way of living. These skills, once considered everyday knowledge, are making a comeback because they give us control over our homes, our health, and even our budgets. In an era of convenience, there’s power in knowing you don’t have to rely on store-bought everything.
Once upon a time, knowing how to bake a loaf of bread, sew a torn dress, or preserve the summer’s bounty was just a way of life. It wasn’t considered impressive or rare—it was simply what people did to care for their homes and families. But somewhere along the way, we traded those time-honored homemaking skills for convenience, fast food, and store-bought everything. And now? We’re starting to realize that maybe Grandma was onto something.
The truth is, old-fashioned homemaking skills are making a major comeback, and for good reason. From skyrocketing grocery prices to a desire for more sustainable, self-sufficient living, these skills are proving to be just as valuable—if not more so—than they were a hundred years ago. Let’s talk about why these traditional skills still matter and how they can enrich your life today.
1. Cooking from Scratch: A Healthier, Budget-Friendly Choice
Processed foods have taken over our pantries, but learning how to cook from scratch is one of the most powerful homemaking skills you can have. Not only is homemade food more nutritious, but it’s also significantly cheaper in the long run. Baking your own bread, making yogurt, or whipping up homemade broth reduces your reliance on store-bought goods filled with preservatives and artificial ingredients.
How to Get Started: Start with something simple, like homemade muffins (I’ve got an amazing bulk muffin mix recipe!) or a batch of sourdough bread. Once you get comfortable, expand to making your own condiments, soups, and sauces.
2. Gardening: Grow Your Own Food, Save Money, and Eat Better
There’s something deeply satisfying about growing your own food. Whether you have a sprawling backyard garden or just a few potted herbs on a windowsill, growing even a small portion of your food helps cut grocery costs, reduces exposure to pesticides, and ensures your family has fresh, nutrient-dense produce.
Where to Start: Hardy vegetables like lettuce, radishes, and carrots are easy to grow for beginners. If you’re tight on space, try container gardening with herbs like basil, rosemary, and thyme. And if you really want to step up your game, check out Seedtime—my favorite garden planning app—to help you plan, plant, and harvest efficiently! Right now you can try Seedtime for FREE. Check that out here.

3. Food Preservation: No More Wasted Produce
Back in the day, throwing out food was unheard of. Families relied on canning, fermenting, dehydrating, and freezing to store their harvests for the months ahead. Today, food waste is a huge issue—but reviving these preservation techniques can help.
Simple Preservation Methods to Try:
Canning: Start with water-bath canning for jams, jellies, and pickles.
Fermenting: Homemade sauerkraut or kimchi is a probiotic-rich addition to your meals.
Dehydrating: Drying herbs, fruit, and even meats extends their shelf life without refrigeration.
4. Sewing and Mending: Slow Fashion at Its Finest
Fast fashion may be cheap, but it’s also wasteful. Clothes aren’t made to last anymore, and replacing them constantly can be expensive. Learning basic sewing skills—like mending holes, hemming pants, or even making your own clothes—saves money and keeps textiles out of landfills.
Beginner Sewing Tips: Invest in a simple sewing kit and start with hand-mending small holes or sewing on buttons. If you have access to a sewing machine, try making cloth napkins or pillowcases to practice before moving on to clothing repairs.
5. Homemaking as a Form of Self-Sufficiency
The more you know how to do for yourself, the less reliant you are on grocery stores, big-box retailers, and supply chains. That’s a powerful thing, especially in uncertain times. Knowing how to bake bread, grow a garden, or make homemade cleaning supplies means you’re better prepared for anything life throws your way.
6. The Joy of Slowing Down and Living Intentionally
One of the most beautiful things about traditional homemaking skills is that they force us to slow down. Kneading dough, planting seeds, or stitching a hem isn’t just productive—it’s meditative. In a world that’s constantly moving at full speed, these skills remind us to pause, enjoy the process, and take pride in what we create with our own hands.
Bringing It All Together: Start Small, But Start Somewhere
If you’re new to old-fashioned homemaking, don’t feel like you need to master everything at once. Pick one skill that excites you and give it a try. Maybe it’s learning to make your own bread, growing a few herbs on your porch (or in your flourishing hydroponics setup), or trying your hand at sewing. The more you learn, the more rewarding it becomes.
So, what old-fashioned homemaking skill are you most excited to bring back? Let’s chat in the comments—I’d love to hear what you’re working on!
And if you’re looking for more ways to simplify and enhance your homemaking journey, stick around—I’ve got plenty more tips, tricks, and recipes coming your way!

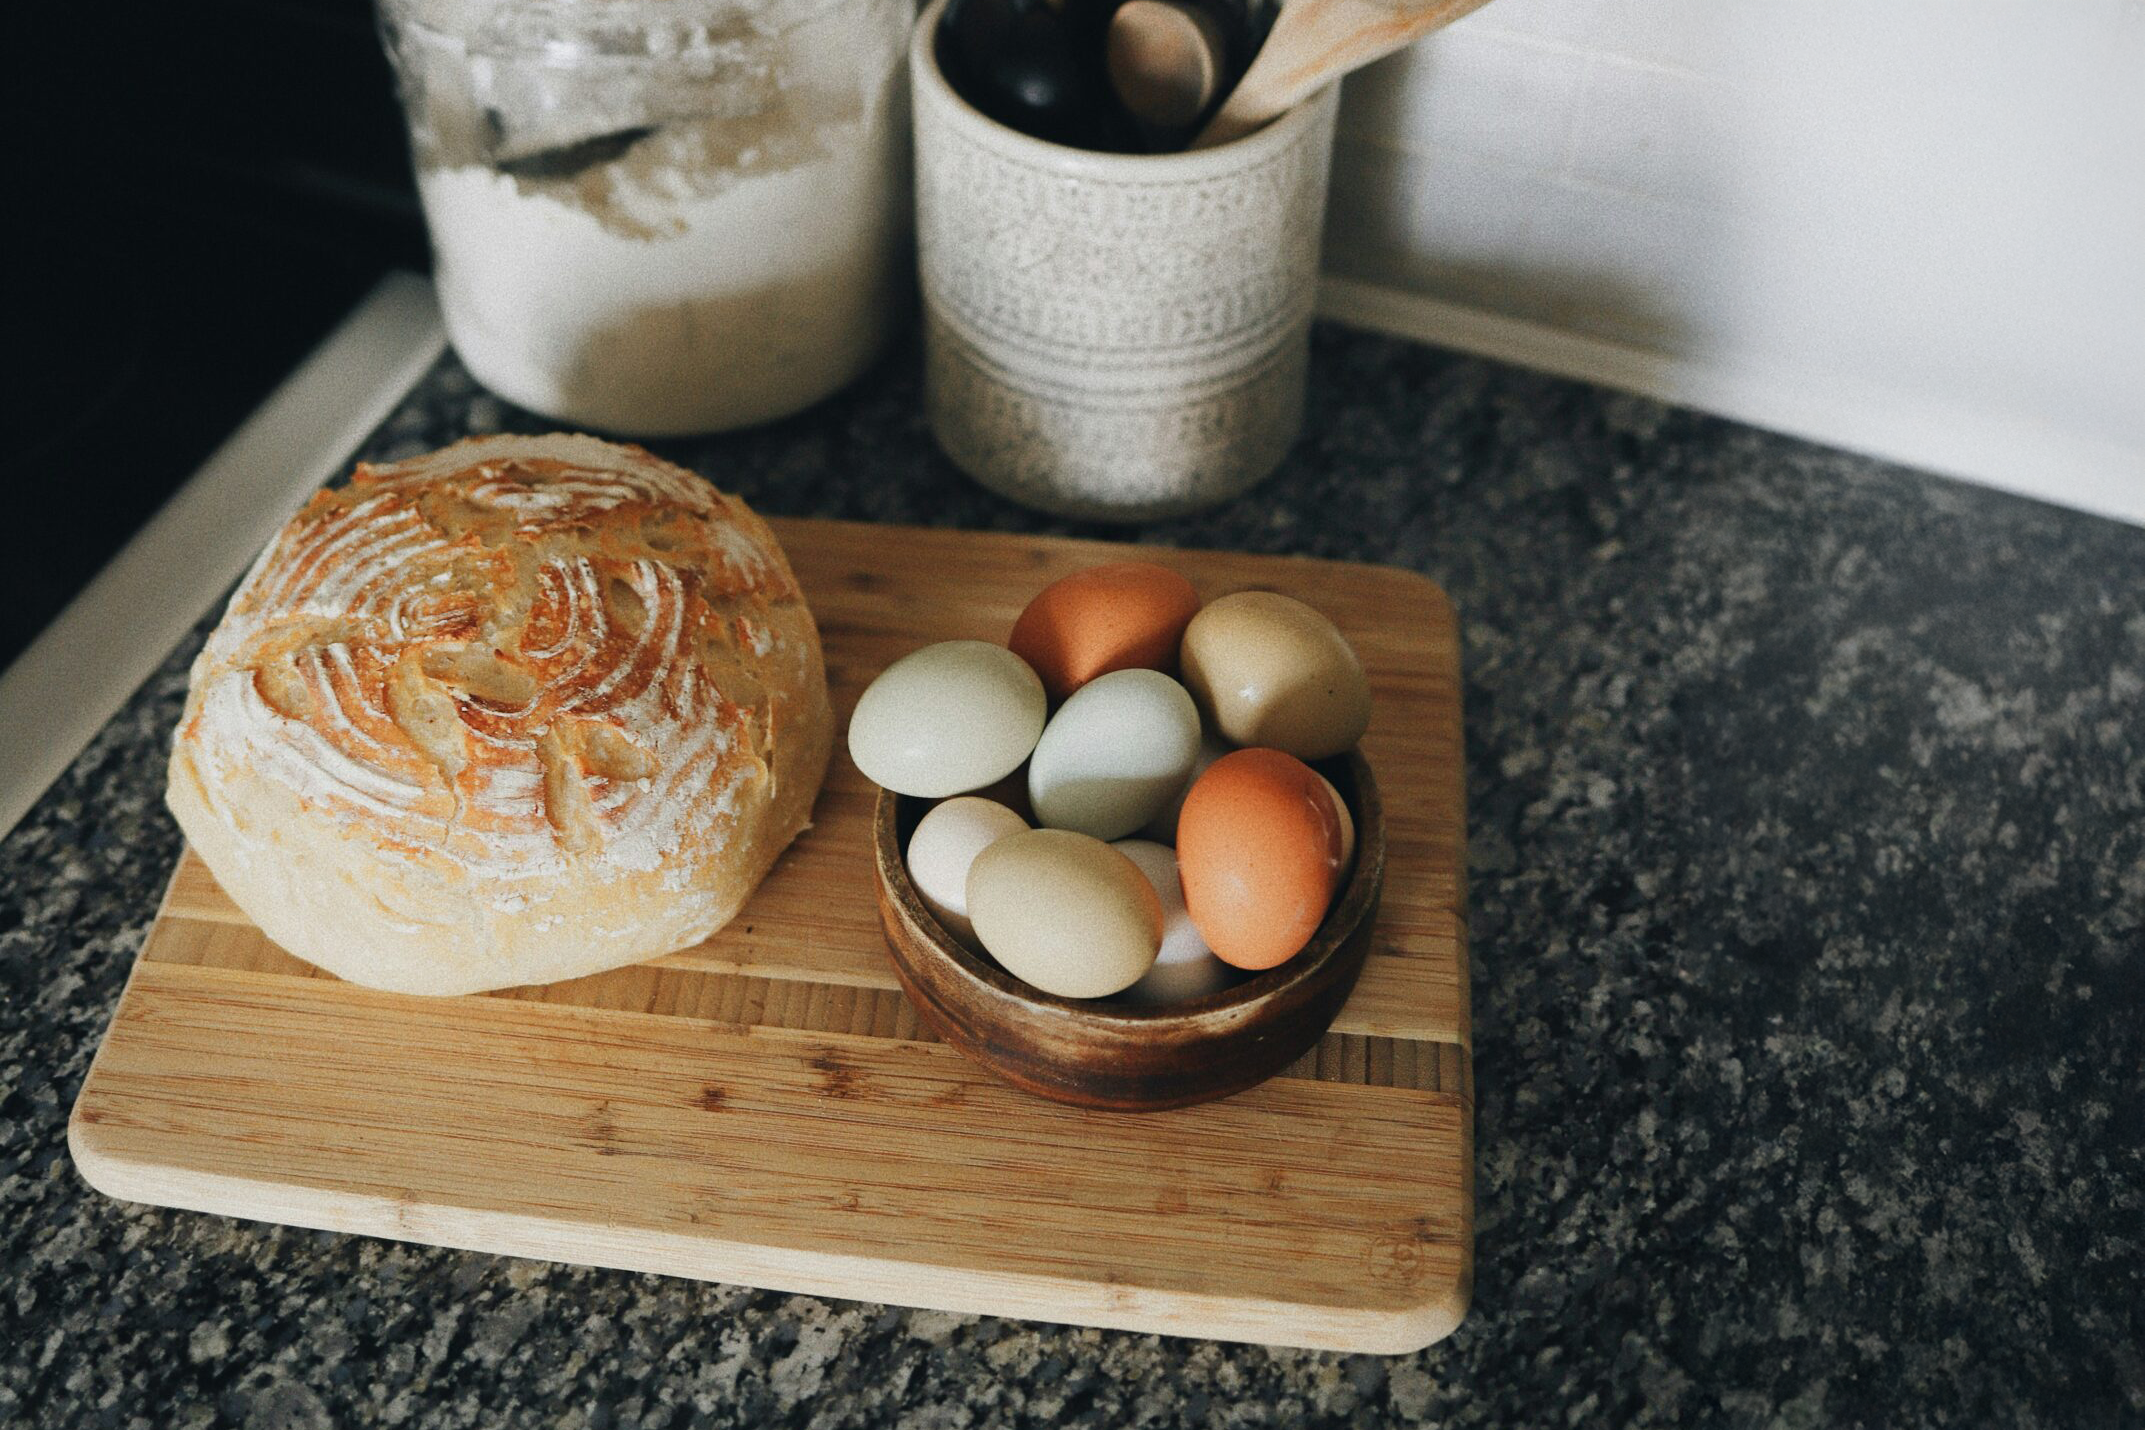
Beginner-Friendly Artisan Sourdough Boule Recipe
If you’ve ever dreamed of baking a rustic, golden-brown sourdough boule with a crispy crust and soft, airy crumb—this is the recipe for you! Whether you're brand new to sourdough or looking to refine your technique, I’ll guide you through each step, from mixing and fermentation to shaping and scoring. Plus, I’m sharing my best rookie tips to help you avoid common mistakes and bake a loaf you’ll be proud of!
So, you’ve got a bubbly sourdough starter and are ready to bake your first artisan boule? Perfect! If your starter needs some work, check out the post Sourdough Starters for Newbies. There are a few tools you will need to get you on your way. Here is a convenient bread baking basket set that’s great for those just starting out who want to create artisanal masterpieces! This set has banneton baskets, a bread whisk, a scoring lame, dough scraper, and more! It’s everything I wish I could’ve just bought at once.
This beginner-friendly recipe will walk you through the process step by step, so you can bake a beautifully crusty loaf with that signature tangy flavor. Sourdough baking might seem intimidating at first, but I promise—it’s all about patience and practice. Let’s get started!
Ingredients:
500g bread flour (higher protein is best for gluten development)
75g active sourdough starter (fed and at peak rise)
320g filtered water (room temp; avoid chlorinated tap water)
10g sea salt (for flavor and gluten strength)
Why These Ingredients Matter
Baking sourdough is part art, part science. Here’s what you need to know:
Flour: Bread flour is ideal for a strong dough structure. You can mix in a little whole wheat for extra flavor, but for an easier first bake, stick to mostly white flour. King Arthur is my favorite.
Water: Hydration affects texture and fermentation speed. If your kitchen is humid, you may need slightly less water.
Salt: Enhances flavor and controls fermentation. Don’t skip it!
Starter: The heart of sourdough. If it’s not active and bubbly, your bread won’t rise properly.
Step-by-Step Instructions
1. Mix the Dough (Morning or Evening)
In a large mixing bowl, stir together the starter and water until mostly dissolved. Add the flour and mix with your hands, a spoon, or a dough whisk until no dry bits remain. The dough will look rough and shaggy—that’s fine! Cover and let it rest for 30-45 minutes (this step, called autolyse, helps gluten form naturally).
2. Add the Salt
Sprinkle salt over the dough, then use your fingers to pinch, fold, and work it in. You’ll notice the dough starts feeling stronger.
3. Bulk Fermentation (4-6 Hours)
Cover the bowl and let the dough rest at room temp (around 70-75°F). During this time, it’ll rise and develop structure. Every 30-45 minutes, do a stretch and fold: grab one side of the dough, stretch it up, and fold it over itself. Repeat on all four sides. Do this 4-5 times total during the bulk fermentation. After your final stretch and fold, allow it to sit covered in a bowl for a couple hours until it doubles in size.
Pro Tip: If your dough isn’t rising much, your kitchen might be too cold. Move it to a warmer spot or give it extra time.
4. Shape the Boule
Once the dough has doubled in size, lightly flour a surface and shape it into a round boule. Pull the edges toward the center, then flip the dough and gently tighten it into a smooth round shape.
Be gentle! You don’t want to deflate the lovely air pockets inside.
5. Final Proof (8-12 Hours in the Fridge)
Place your shaped dough into a well-floured banneton (or a bowl lined with a floured towel). Cover and refrigerate overnight. This long, cold fermentation enhances the flavor and texture.
Why chill the dough? Cold fermentation (also called retardation) improves crust development and flavor depth.

6. Preheat & Bake
Preheat your oven to 475°F (245°C) with a Dutch oven inside. Turn your dough out onto a large piece of parchment paper or a dough sling. When the Dutch oven is hot, gently place your dough in the Dutch oven, score the top with a sharp knife or lame, and cover with the lid.
Bake covered for 25 minutes (this traps steam for a crackly crust)
Drop the temp on the oven to 425°F and bake uncovered for 20 minutes until deep golden brown
No Dutch oven? Use a baking stone or sheet pan and place a pan of hot water in the oven for steam. If you want to snag a beautiful Dutch oven for yourself, click here.
7. Cool Completely Before Cutting!
Once out of the oven, resist the urge to cut into your bread right away. Let it cool on a wire rack for at least 1-2 hours.
Why wait? Cutting too soon releases steam, leaving you with a gummy, underdeveloped crumb.
Common Beginner Questions
Why Didn’t My Bread Rise?
Your starter may not have been active enough. Try the float test (drop a spoonful into water—it should float!).
Bulk fermentation may have been too short. If your dough hasn’t nearly doubled, let it go longer.
Your kitchen may be too cold. Find a warmer spot for proofing.

How Can I Get a More Open Crumb?
Use slightly more water for higher hydration.
Handle the dough gently during shaping.
Make sure it proofs fully before baking.
Best Way to Store Sourdough?
Store in a paper bag or wrapped in a towel to maintain the crust. For longer storage, slice and freeze. I also use these great reusable bread bags and buy extras for when I send bread to work with my husband for his friends.
Final Thoughts
Sourdough baking is all about learning as you go. Your first loaf might not be perfect, but each time you bake, you’ll get better at reading your dough and adjusting for your environment.
This artisan boule recipe is a great starting point. Stick with it, and soon, you’ll be baking loaves that rival any bakery!
Now go forth and bake! Let me know how it turns out—I’d love to hear about your sourdough journey!
Links to products in this post can possibly lead to a small commission for me. But friendly reminder, I will never endorse a product I don’t believe in!

Sourdough Starters for Newbies
So, your friend gave you a sourdough starter—now what? Don’t worry, I’ve got you! Keeping a starter alive isn’t as complicated as it seems, and once you get into the routine, it’s like having a low-maintenance pet that rewards you with amazing homemade bread. In this post, I’ll walk you through how to feed, store, and troubleshoot your starter so you can bake delicious loaves with confidence.
A sourdough starter is a mixture of flour and water that has captured wild yeast and good bacteria from the environment. This natural fermentation process is what makes sourdough bread rise—without commercial yeast! But because it’s alive, it needs regular feeding to stay strong and active.
When your friend handed you their starter, they essentially gave you a little piece of their sourdough legacy. Now it’s up to you to keep it thriving!
Step 1: Assess Your New Starter
Before you start feeding, take a look (and a sniff!). Here’s what to check:
Smell: It should have a tangy, slightly yeasty scent. If it smells like vinegar, that’s okay too—it's just a little hungry!
Bubbles: Some bubbles are a good sign. If it looks flat, don’t worry, feeding will bring it back to life.
Color: A creamy beige is normal. If you see gray liquid on top (called “hooch”), that just means it’s extra hungry. Stir it in or pour it off before feeding.
If your starter smells rotten, moldy, or has pink/orange spots, it may have gone bad. In that case, it's best to start fresh.
Step 2: Pick Your Feeding Ratio
Sourdough feeding is just a simple mix of starter, flour, and water. The ratio you use will depend on how thick or active you want your starter to be.
Here are three common feeding ratios:
1:1:1 (Equal Parts Starter, Flour, and Water)
Great for daily maintenance and keeping the starter happy.
Example: 50g starter + 50g flour + 50g water.
1:2:2 (A Little More Food)
Helps boost a sluggish starter or maintain an active one.
Example: 50g starter + 100g flour + 100g water.
1:3:3 (For a Really Hungry Starter)
Ideal if your starter has been neglected or needs extra strengthening.
Example: 50g starter + 150g flour + 150g water.
All measurements are by weight for accuracy (a kitchen scale is super helpful here. If you need a recommendation, check out Sourdough Isn’t Complicated. Here’s What You Need to Know), but if you’re using cups:
1:1:1 = 1/4 cup starter + 1/4 cup flour + a little less than 1/4 cup water.
1:2:2 = 1/4 cup starter + 1/2 cup flour + about 1/2 cup water.
Step 3: Feeding Your Starter
Now that you’ve picked your ratio, here’s how to feed your starter:
Remove and Discard Some Starter
If your friend gave you a large amount, take out about half before feeding. This prevents your starter from growing too large and keeps it balanced.
Add Flour and Water
Stir in the chosen ratio of fresh flour and water. Mix well until combined—no dry spots!
Cover and Let It Rest
Loosely cover your jar with a lid or cloth and place it in a warm spot (70-75°F is ideal).
Let it sit for 6-12 hours until bubbly and doubled in size.

Step 4: Maintain a Feeding Schedule
Now that your starter is happy and well-fed, you have two options:
If Baking Daily:
Feed your starter once or twice a day using the 1:1:1 or 1:2:2 ratio.
If Baking Weekly:
Store your starter in the fridge and feed it once a week to keep it alive. When ready to bake, pull it out 1-2 days in advance and feed it a couple of times to wake it up.
Common Sourdough Starter Questions
Can I Change the Type of Flour?
Yes! Starters love variety, but they do best when gradually introduced to new flours. Whole wheat and rye tend to make starters extra active, while all-purpose is a great standard choice. King Arthur has been my fave. Here’s a link to Amazon to make buying super easy!
Why Isn’t My Starter Bubbling Yet?
Give it time! A new environment can make your starter sluggish. Try keeping it warm and feeding with a 1:2:2 ratio to give it more food.
What Do I Do with the Discard?
Please don’t throw it away! Use it in pancakes, crackers, waffles, muffins, or even compost it. There are so many fun discard recipes to try!
Final Thoughts
Feeding your sourdough starter doesn’t have to be complicated. With just a little flour, water, and patience, you’ll soon have an active, happy starter ready to help you bake the best bread of your life. When you’re ready to bake an artisan sourdough boule, head here for a mouth watering recipe!
Have you ever been gifted a sourdough starter? Let me know in the comments how your feeding process is going—I’d love to hear about your journey!

The Ultimate Guide to Rosemary: How to Grow, Harvest & Use This Incredible Herb
Rosemary isn’t just a fragrant herb—it’s a powerhouse in the kitchen, the garden, and even your self-care routine! From boosting memory to supporting hair growth, this hardy herb is as versatile as it is beneficial. Whether you're looking to grow your own rosemary, make homemade rosemary oil, or bake a loaf of rosemary-infused sourdough, this guide covers everything you need to know about this incredible plant.
If you’ve ever brushed against a rosemary plant in a garden, you know just how intoxicating that fresh, piney scent is. But rosemary isn’t just a pretty herb with a heavenly aroma—it’s a powerhouse in the kitchen, a secret weapon for natural beauty, and a go-to remedy for wellness. Whether you’re growing it at home, using it to elevate your homemade bread, or making rosemary water for hair growth, this guide will walk you through everything you need to know about this incredible herb.
What is Rosemary?
Rosemary (Salvia rosmarinus) is an evergreen shrub that belongs to the mint family. With needle-like leaves and a distinct, woodsy fragrance, this Mediterranean native has been cherished for centuries for both its culinary and medicinal properties. The name “rosemary” comes from the Latin words ros (dew) and marinus (sea), meaning “dew of the sea,” since it thrives in coastal climates.
Where Does Rosemary Grow Best?
If you want to grow rosemary, the good news is that it’s relatively low-maintenance! Here’s what it needs to thrive:
Sunlight: Rosemary loves full sun—at least 6-8 hours of direct sunlight per day.
Soil: It prefers well-draining soil, ideally sandy or loamy, to prevent root rot.
Watering: While it’s drought-tolerant once established, it still enjoys deep but infrequent watering.
Climate: Rosemary grows best in zones 7-10, but you can also grow it in a pot and bring it indoors in colder months.
Companion Plants: Rosemary pairs well with cabbage, beans, and carrots in the garden, as it helps deter pests.
How Long Does Rosemary Take to Harvest?
Patience is key when growing rosemary! It can take about 6-12 months to mature enough for a good harvest. However, you can start snipping small sprigs as soon as the plant is well-established. For the best flavor and potency, harvest in the morning when the oils are most concentrated.

The Benefits of Rosemary
Rosemary isn’t just another herb—it’s packed with amazing health benefits! Here are a few reasons to love it:
✅ Boosts Memory & Focus: Rosemary has been linked to improved cognitive function and may help with memory retention. ✅ Supports Hair Growth: Rosemary water and oil are known to stimulate hair follicles, promoting thicker, healthier hair. ✅ Anti-Inflammatory Properties: Its compounds help reduce inflammation, making it great for joint pain and sore muscles. ✅ Supports Digestion: Rosemary aids in digestion and can help alleviate bloating and indigestion. ✅ Rich in Antioxidants: Packed with antioxidants, rosemary helps fight free radicals and supports overall wellness.
Ways to Use Rosemary
1. Rosemary Water for Hair Growth
Rosemary has been used for centuries as a natural remedy for hair thinning and scalp health. Here’s how you can make your own rosemary water:
How to Make Rosemary Water:
Boil 2 cups of water and add a handful of fresh rosemary sprigs.
Let it simmer for 15-20 minutes until the water turns a deep amber color.
Allow it to cool, then strain the leaves out.
Pour into a spray bottle and use as a hair rinse 2-3 times a week to stimulate growth and strengthen hair.
✅ Tip: Store in the fridge and use within a week for freshness!
2. DIY Rosemary Oil
Rosemary-infused oil is a great multipurpose remedy for hair, skin, and cooking.
How to Make Rosemary Oil:
Fill a clean jar with fresh rosemary sprigs.
Cover with a carrier oil like olive oil or jojoba oil.
Let it sit in a warm spot for 2-4 weeks, shaking it occasionally.
Strain out the rosemary and store the oil in a dark glass bottle.
Use it for scalp massages, dry skin, or even drizzling over roasted veggies!
3. Rosemary in Baking (Try It in Bread!)
Nothing beats the smell of homemade rosemary bread fresh from the oven. Rosemary adds an earthy, savory depth to baked goods, and it pairs beautifully with garlic, olive oil, and sea salt.
Simple Rosemary Bread Recipe:
3 cups flour
1 tablespoon fresh rosemary, chopped
2 teaspoons salt
1 packet yeast
1 cup warm water
2 tablespoons olive oil
Mix, knead, let rise, and bake at 375°F for 25-30 minutes. Serve warm with butter!
4. Rosemary Tea for Digestion & Immunity
A cup of rosemary tea can work wonders for digestion, headaches, and stress relief.
How to Make Rosemary Tea:
Add 1-2 teaspoons of dried or fresh rosemary to a teapot.
Pour hot (not boiling) water over it and steep for 5-10 minutes.
Strain and enjoy with a touch of honey.
5. Medicinal Uses of Rosemary
Beyond cooking, rosemary has been used as a natural remedy for colds, sore muscles, and stress relief. Here’s how you can incorporate it into your routine:
Steam Inhalation: Add rosemary to boiling water and inhale the steam for clearer sinuses and respiratory relief.
Muscle Soak: Infuse rosemary in warm bathwater to soothe sore muscles.
Headache Relief: Rub diluted rosemary oil on temples for natural headache relief.
Final Thoughts: Why You Need Rosemary in Your Life
Whether you’re growing it in your garden, using it for hair growth, or baking it into fresh bread, rosemary is one of those herbs that belongs in every home. It’s easy to grow, packed with benefits, and has endless uses. If you haven’t already added rosemary to your routine, now’s the perfect time!
Do you love using rosemary? Let me know your favorite way to use it in the comments below! Happy gardening and happy herbal experimenting!

60 Must-Try Unit Study Ideas for Kindergarten: A Fun & Stress-Free Homeschool Year
Homeschooling a kindergartener is such a special time—it’s all about curiosity, discovery, and (let’s be honest) keeping those wiggly little learners engaged! If you’ve ever felt overwhelmed by planning, unit studies are a game-changer. They let you dive deep into fun topics, mix in reading, science, and hands-on activities, and best of all—make learning feel effortless.
I’ve put together a year’s worth of unit study ideas—5 per month—that are easy to adapt for different ages and perfect for multi-age homeschooling. Whether you’re dreaming up a solar system adventure, a hands-on farm unit, or a magical winter animal study, this guide will help you plan stress-free, engaging lessons your kids will love. Let’s make this homeschool year the best one yet!
Homeschooling a kindergartener is such a sweet season—so full of curiosity, energy, and (let’s be real) short attention spans. If you’re anything like me, you want to keep learning fun while sneaking in some structure. That’s why unit studies are my go-to! They make it easy to dive deep into topics, adapt lessons for all ages, and create hands-on learning moments that actually stick.
To make planning easier, I’ve put together a whole year’s worth of engaging unit study ideas—five per month! These are designed for kindergarteners but can be adjusted for older or younger siblings, making them perfect for multi-age homeschooling.
January – Cozy Learning & Winter Wonders
❄️ Winter Animals – Learn about hibernation, migration, and animals that love the snow. Read The Mitten and make animal tracks in the mud or snow!
🥶 Weather & Seasons – Track the daily temperature, make a weather journal, and explore why we have seasons.
🩺 Community Helpers (Doctors & Nurses) – Play doctor with stuffed animals, learn about germs, and practice proper handwashing.
🗺️ Maps & Globes – Explore basic geography by making a simple map of your home or neighborhood.
🍞 Bread Around the World – Bake different kinds of bread and learn about cultures that eat them. (Hello, sourdough starter!)
February – Love & Curiosity
❤️ Valentine’s Day & Kindness – Write love notes to family, read books about kindness, and do small acts of service.
🦷 Dental Health – Talk about teeth, practice brushing on a model, and visit a dentist’s office.
🚀 Solar System – Learn about planets, phases of the moon, and make a paper mâché solar system!
🦜 Birds & Migration – Set up a bird feeder, observe local birds, and learn about their songs.
💰 Money & Math – Play “store,” practice counting coins, and start a tiny savings jar.
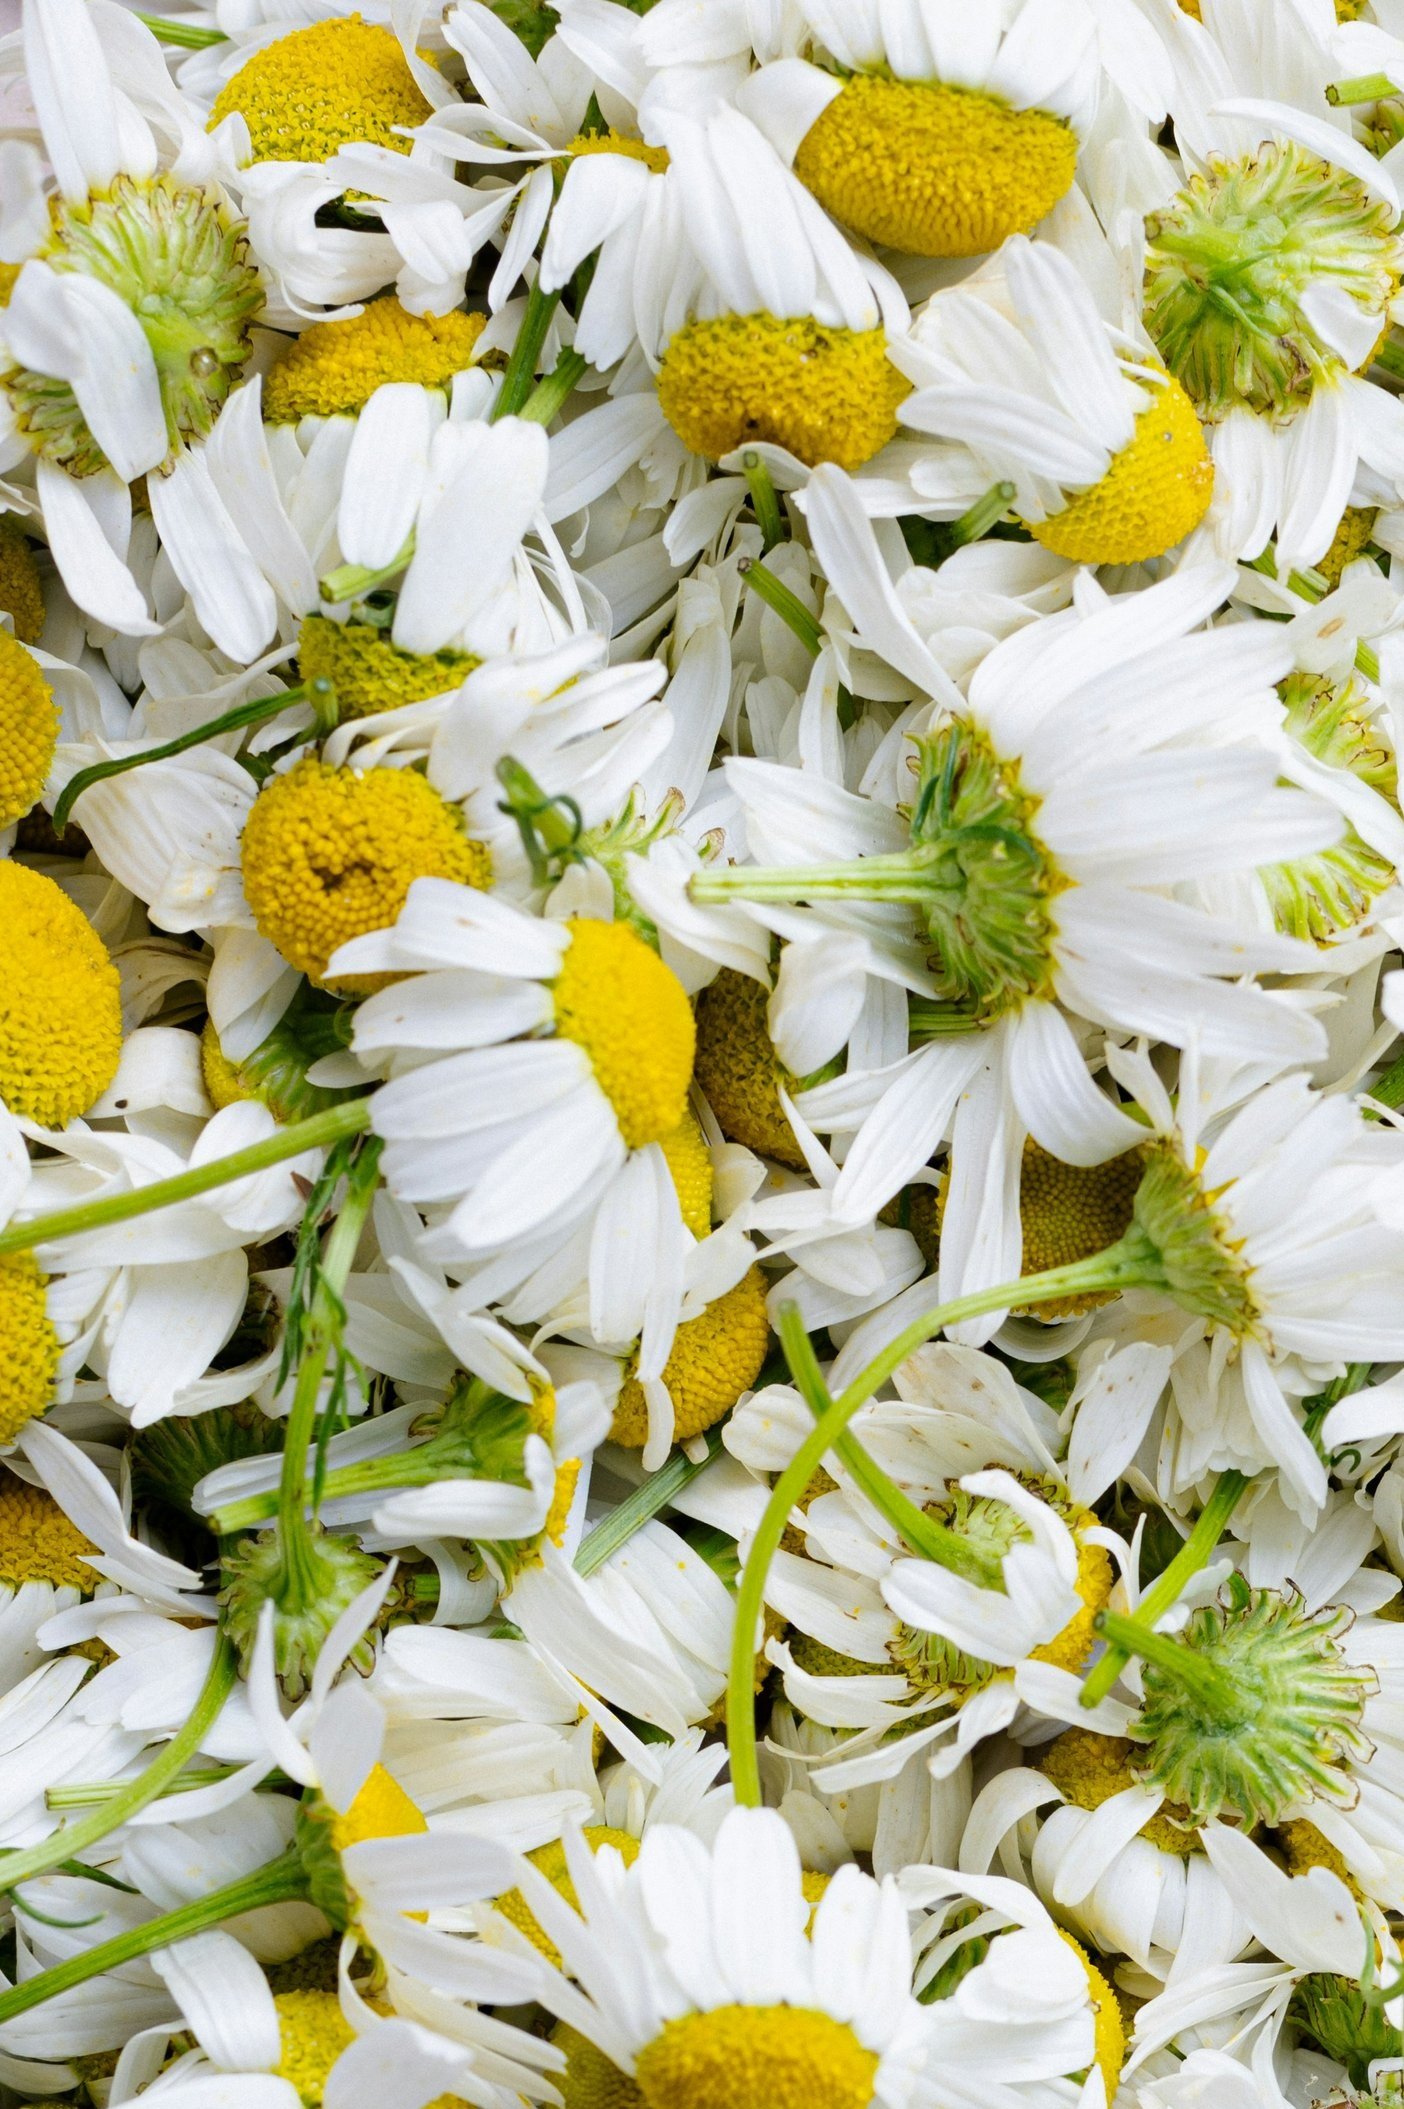
March – Spring into Learning
🌱 Gardening & Plant Life – Start seedlings indoors, explore what plants need to grow, and taste-test different veggies.
🌦 Rain & Water Cycle – Make a rain gauge, do fun water experiments, and learn about the power of rain.
📚 Famous Authors & Illustrators – Focus on a favorite author (Dr. Seuss is an easy pick!) and create a book in their style.
🐄 Farm Life – Learn about farm animals, visit a local farm, and plant something simple like lettuce or radishes.
🎭 Fairy Tales & Folklore – Read classic tales and act them out with puppets or dress-up clothes.
April – Springtime Fun
🐝 Bugs & Insects – Go on a bug hunt, learn about life cycles, and raise butterflies or ladybugs.
🌎 Earth Day & Recycling – Make crafts from recycled materials and talk about ways to care for the planet.
🐸 Ponds & Wetlands – Learn about frogs, ducks, and fish, and visit a pond to observe wildlife.
🦖 Dinosaurs – Dig up “fossils” in a sandbox and learn about different prehistoric creatures.
🎶 Music & Rhythm – Explore different instruments, listen to classical music, and try making your own songs.
May – Outdoor Explorations
🦋 Butterflies & Pollinators – Raise caterpillars and release butterflies or learn about bees and their hives.
🏕 Camping & Outdoor Safety – Set up a pretend campsite in the backyard and learn basic survival skills.
🌊 Oceans & Marine Life – Learn about tide pools, sharks, and coral reefs, and do an ocean sensory bin.
🍓 Farm-to-Table Eating – Visit a farmer’s market, cook with fresh produce, and learn where food comes from.
🎨 Art Around the World – Try different styles of art from various cultures (Japanese ink painting, African mud cloth).
June – Summer Adventures
🏄♂️ Beaches & Seashells – Collect shells, learn about tide patterns, and create beach-themed crafts.
🦕 Caves & Rocks – Study different types of rocks, make a crystal-growing experiment, and learn about caves.
🍦 Ice Cream Science – Make homemade ice cream and explore how freezing works.
🐞 Backyard Bugs – Get a magnifying glass and investigate what’s living in your backyard!
⚓ Pirates & Treasure Hunts – Learn about real-life pirates, create treasure maps, and go on a scavenger hunt.
July – Exploring the World
🗽 Patriotic Symbols & US History – Learn about the flag, national monuments, and early American history.
🌋 Volcanoes & Geology – Make an erupting baking soda volcano!
🍉 Summer Fruits & Veggies – Try different summer produce and learn about seasonal eating.
🏜 Desert Life – Explore animals and plants that thrive in extreme heat.
🐘 African Safari Animals – Study giraffes, lions, and elephants, and create an animal mask craft.
August – Getting Hands-On
🎭 Shakespeare for Kids – Read A Midsummer Night’s Dream and act out a scene.
🚂 Transportation & Travel – Learn about trains, planes, and automobiles.
🏰 Castles & Knights – Build a cardboard castle and learn about medieval life.
🎨 Famous Artists – Explore Van Gogh, Monet, or Frida Kahlo and recreate their art.
🍞 Baking Science – Experiment with yeast and rising dough (great excuse to bake bread!).
September – Fall Learning Fun
🍁 Leaves & Trees – Collect and press leaves, identify different trees, and explore why they change colors.
🌍 Continents & Countries – “Visit” a different continent each week with food, music, and crafts.
📜 Tall Tales & Legends – Read and retell folk stories like Paul Bunyan and Johnny Appleseed.
🚜 Harvest & Farming – Learn about crops, harvesting, and how food gets from farm to table.
🌙 Moon & Space Exploration – Study astronauts, the phases of the moon, and stargazing basics.
October – Spooky & Seasonal Fun
🎃 Pumpkins & Gourds – Cut one open, count seeds, and explore textures.
🦇 Nocturnal Animals – Learn about bats, owls, and foxes!
👻 Classic Monster Stories – Read Frankenstein (the kids' version, of course) and create silly monster crafts.
🕸 Spiders & Webs – Observe webs outside and learn how spiders help the environment.
🔬 Mad Scientist Experiments – Do simple chemistry experiments, like making slime!
November – Cozy & Creative Learning
🦃 Thanksgiving & Gratitude – Keep a gratitude journal and learn about the holiday’s history.
🥧 Baking & Measuring – Practice simple recipes and learn about fractions.
🐻 Hibernation & Animal Homes – Create a cozy den for stuffed animals and learn why animals hibernate.
🎭 Acting & Drama – Put on a family play or puppet show!
🧵 Simple Sewing Skills – Try lacing cards or basic hand-sewing projects.
December – Festive & Fun
🎄 Christmas Around the World – Explore holiday traditions from different countries.
🕯 Light & Shadows – Learn about the science of light with flashlights and shadow puppets.
🎁 Handmade Gifts & Giving – Make simple DIY gifts for loved ones.
❄️ Snow & Ice Science – Try freezing experiments and learn about snowflakes.
🎶 Holiday Music & Carols – Learn festive songs and their history!
I hope this list makes lesson planning a little easier for you! Let me know which unit studies you’re excited to try. 💛

The Best Garden Planning App You Need (Try it for FREE!)
Garden planning just got way easier! If you've ever struggled with when to plant, what to plant, or how to keep track of it all, Seedtime is the ultimate garden planning app you need. It takes the guesswork out of scheduling, helps you map out your garden with ease, and even adjusts for your local frost dates. Whether you're a beginner or a seasoned gardener, Seedtime makes planning and managing your crops effortless. Ready to grow your most organized and productive garden yet? Let’s dive into why Seedtime is a total game-changer!
If you’ve ever felt overwhelmed trying to plan your garden, keep track of planting dates, or figure out the best time to start seeds—you're not alone. Garden planning can be a juggling act, especially if you want to maximize your harvest and grow food efficiently. That’s where Seedtime, the best garden planning app I’ve ever used, comes in.
This powerful tool takes the guesswork out of gardening, helping you plan, track, and optimize your planting schedule with ease. Whether you’re a seasoned gardener or just starting out, Seedtime makes it simple to create a well-organized, thriving garden. Let’s dive into why this app is a game-changer for gardeners!
Why Use a Garden Planning App?
Planning a garden isn’t as simple as just planting seeds and hoping for the best. You have to consider frost dates, spacing, succession planting, and even crop rotation. A good garden planner helps you:
Know exactly when to plant based on your growing zone
Keep track of seed starting, transplanting, and harvesting
Maximize space and yields with smart planning tools
Avoid common gardening mistakes like overcrowding or poor timing
What Makes Seedtime the Best Garden Planner?
Seedtime takes all these factors and simplifies them into an easy-to-use, visual planning tool that anyone can master. Here’s why I love it:

1. Custom Garden Plans for Your Growing Zone
One of the biggest challenges gardeners face is knowing when to start seeds. Seedtime automatically customizes your planting calendar based on your specific location and frost dates, so you always know the best time to start, transplant, and harvest.
2. Drag-and-Drop Visual Planner
This is one of my favorite features! Seedtime lets you drag and drop plants into a timeline, making it easy to see what needs to be planted when. It’s like having a personal garden coach laying out the perfect schedule for you.
3. Succession Planting Made Easy
Want a continuous harvest? Seedtime helps you space out plantings so you don’t end up with everything maturing at once. It’s the easiest way to keep your garden productive all season long.
4. Companion Planting and Crop Rotation Tools
Not sure which plants grow well together? The website (and app!) offers guidance on companion planting to help you make the most of your garden space while keeping pests away naturally. Plus, it helps you rotate crops each year to maintain soil health.
5. Access to a Huge Plant Database
No more guessing! Seedtime includes a massive database of fruits, vegetables, and herbs with specific growing details for each. Need to know how deep to plant your carrot seeds or how much spacing your tomatoes need? It’s all right there in the app.
6. Weather and Frost Date Integration
Seedtime pulls in real-time weather data to help you avoid unexpected frosts or heatwaves. This is a game-changer for gardeners who want to protect their crops and plan ahead.

7. Task Reminders and Notifications
If you’re like me, life gets busy, and sometimes you forget to plant or water on time. Seedtime sends reminders so you stay on track without the stress.
Who Should Use Seedtime?
Honestly, every gardener can benefit from using Seedtime. It’s perfect for:
Beginner gardeners who need help knowing when and how to plant
Experienced gardeners looking to fine-tune their schedules for maximum harvests
Homesteaders who want to grow food efficiently and track their planting history
Urban gardeners working with small spaces and limited growing windows
How to Get Started with Seedtime
Using Seedtime is super easy:
Sign up for an account and enter your growing zone.
Start planning your garden with the drag-and-drop interface.
Customize your schedule based on your planting preferences.
Follow reminders and enjoy a stress-free gardening experience!
Final Thoughts: Want to try Seedtime for FREE?
If you want to grow a thriving, well-organized garden without the overwhelm, Seedtime is absolutely worth it. It’s the ultimate garden planning tool that takes the stress out of when to plant, what to plant, and how to make the most of your growing season.
I highly recommend Seedtime to anyone who wants to take their garden to the next level. Try it out and see how much easier—and more rewarding—gardening can be! Seedtime has given my friends access to try Seedtime for FREE using these links. There are links to the basic AND unlimited subscriptions! Suh-weet! You can also use Seedtime to help grow a thriving hydroponic garden. Check out my other article - How to Grow a Thriving Hydroponic Garden All Year
Seedtime Basic Subscription: Basic Monthly - 30 Day Free Trial
Seedtime Unlimited Subscription: Unlimited Monthly - 30 Day Free Trial
Have you used Seedtime? Let me know in the comments how it has helped your garden planning! Happy growing!

The Ultimate Bulk Muffin Mix: A Healthier, Kid-Approved Recipe
Skip the store-bought muffins! This bulk muffin mix is easy, naturally sweetened, and picky-eater approved. Prep, seal, and enjoy fresh homemade muffins anytime!
If you've ever wished for an easy, homemade muffin mix that’s quick to whip up, naturally sweetened, and picky-eater approved—this is it! My two-year-old, who normally turns his nose up at fruit and veggies, devoured these homemade muffins over a store-bought one this morning. That’s how I know this recipe is a winner!
Why Make a Bulk Muffin Mix?
Having a ready-made muffin mix in your pantry means you can have fresh, homemade muffins in minutes—without the junk found in packaged options. This mix is naturally sweetened with mashed banana, cutting down on refined sugar while keeping the muffins moist and flavorful. Plus, it’s super customizable!
Bulk Chocolate Muffin Mix Recipe (Makes 6 Batches)
Dry Ingredients:
5 cups whole wheat or all-purpose flour
1 cup unsweetened cocoa powder
1.5 cups coconut sugar or cane sugar
3 tablespoons baking powder
1 teaspoon sea salt
Store in an airtight container or portion into jars/bags for quick use. You can also vacuum seal 2-cup portions for an even longer shelf life—making it easy to grab when you need a quick breakfast or snack.
How to Make a Batch (Yields 12 Muffins)
Wet Ingredients:
2 cups dry mix
1 cup milk (or dairy-free alternative)
1 mashed ripe banana (about ½ cup)
1 egg (or flax egg for vegan option)
¼ cup melted butter, coconut oil, or applesauce
½ cup chocolate chips
Instructions:
Preheat oven to 375°F.
Whisk together mashed banana, milk, egg, and melted butter.
Stir in 2 cups of the dry mix until just combined.
Fold in chocolate chips.
Pour batter into greased or lined muffin tins, filling each ¾ full.
Bake for 15–18 minutes, or until a toothpick comes out clean.

Why My Toddler Loves These (And Yours Might Too!)
The natural sweetness from the banana and chocolate chips makes these muffins taste like a treat, while the wholesome ingredients make them a guilt-free snack. They’re soft, fluffy, and perfect for breakfast or an easy grab-and-go snack. If my picky eater approved, chances are yours will too!
Tips & Variations
Swap chocolate chips for blueberries or chopped nuts for variety.
Use oat flour for a gluten-free version.
Add a dash of cinnamon or nutmeg for extra warmth.
This bulk muffin mix has become a lifesaver in my kitchen, and I hope it makes your mornings easier too! Let me know if you try it—I’d love to hear how your family likes it!

How to Combat Default Parent Burnout
Feeling overwhelmed as the default parent? You’re not alone. When your spouse works long hours or night shifts, the mental load can feel like too much to carry. This guide shares practical strategies to recognize burnout, set realistic expectations, and reclaim time for yourself—without the guilt. Because surviving (and thriving) in parenthood isn’t about perfection, it’s about finding balance. Read more and join the conversation!
Let’s have an honest conversation, my friend. Being the “default parent” can feel overwhelming, especially when your spouse works long hours or night shifts. I’ve been there, trying to juggle everything while feeling like I need to hold it all together for the kids. Burnout is real, and it’s okay to acknowledge that you’re experiencing it. Here’s what I’ve learned along the way and some strategies that have helped me cope when the weight feels too heavy.
*Recognize the Signs of Burnout*
I used to think I just needed more coffee or a better to-do list. But when I started feeling irritable, constantly tired, and like I had no patience left, I realized I was on the brink of burnout. Pay attention to those warning signs—it’s your body’s way of saying, “Hey, I need help!”
*Accept That You Can’t Do It All and Set Realistic Expectations*
This was a tough lesson for me. I wanted to be the Pinterest-perfect mom, but honestly? Some days, my kids watch extra TV, and dinner is cereal. That’s perfectly okay. Give yourself permission to lower the bar when you need to.
*Build in Little Breaks*
When you’re solo parenting most of the time, finding a moment for yourself can feel impossible. But even a 5-minute breather can make a difference. I sometimes lock myself in the bathroom (a classic mom move) to take a few deep breaths or step outside for some fresh air while the kids are occupied. When it gets really bad, I might sneak a piece of chocolate into my walk-in closet and indulge in a little peace and quiet.
*Actively Seek Support from Friends and Family*
This took me a while to feel comfortable doing. Whether it’s calling a friend to vent, asking family to watch the kids for an hour, or even hiring a sitter, it’s okay to lean on your support network. If you don’t have one, there are local parenting groups or online communities that can be a lifeline. I highly recommend using the Peanut app. It’s like Tinder but for moms; you can set your kids' ages, your location, and your interests, and it will suggest other women you might connect with. I’ve met some wonderful mom friends through it who reassure me that I’m not a terrible parent just because I don’t have it all together.
*Find Something That’s Just for You*
When you’re the default parent, it’s easy to lose sight of your own needs. Find a hobby or activity that’s just for you, whether it’s gardening, journaling, blogging (wink, wink), or binge-watching a show after the kids go to bed. For me, it’s my garden—a little escape where I can focus on something that grows quietly without asking for snacks.
*Reframe Your Mindset*
Some days, I remind myself that my kids won’t always need me like this. It’s not about toxic positivity—there are days when I feel drained and overwhelmed—but reframing my thoughts can help me push through. I tell myself, “This is hard, but I’m doing it,” instead of “I can’t handle this anymore.”
*Plan for Connection, Even with a Shift Work Schedule*
When my husband is working long hours or night shifts, we prioritize open communication. A quick text check-in, a shared calendar to leave notes, or even a simple “I love you” message before he goes to bed can make a big difference. I’ve always appreciated love letters; my dad used to write me little notes on the back of his work sheets when I was a girl, leaving them for me to find before school. I still feel that special connection when my husband leaves me letters. It really helps to feel like you’re in this together.
*Celebrate the Small Wins*
Some days, just getting everyone fed, dressed, and alive feels like climbing Everest. Celebrate those wins! Did you finally fold the laundry? Amazing. Did your toddler eat a vegetable today? Victory! Focusing on what you accomplished helps lighten the mental load.
*Prioritize Rest When You Can*
I know this is easier said than done, but I’ve learned to take rest wherever I can find it. When the kids nap, I’ll grab a quick 10-minute (or sometimes an hour) rest. Letting the dishes sit for a while won’t hurt anyone.
*Remind Yourself That You’re Enough*
Being the default parent is tough, but you’re doing an amazing job. On hard days, I remind myself: I’m showing up, my kids are loved, and that’s what really matters.
You’re Not Alone
If you’re feeling burnt out, know that it doesn’t mean you’re failing—it means you’re human. Let’s talk about it in the comments, share tips, or just support each other. We’ve got this!

How to Grow a Thriving Hydroponic Garden All Year
Want fresh, homegrown greens without the hassle of soil? Hydroponic gardening lets you grow herbs, lettuce, and even small fruits indoors—all while using 90% less water than traditional gardening. This beginner-friendly guide covers DIY hydroponic setups, the Kratky method, and must-know tips for year-round success. Whether you're working with a 5-gallon bucket or a full system, you’ll be harvesting crisp, delicious produce in no time! Read more and start growing today!
Looking for cheap hydroponic ideas? DIY enthusiasts can repurpose items like plastic tubs or Mason jars to create their own systems. It’s an incredibly cost-effective way to grow herbs, leafy greens, and even small fruits indoors. All you need is a sunny windowsill or some grow lights, and you’ll be harvesting fresh produce year-round. Many hydroponic beginners start with the Kratky method, named after the inventor Bernard Kratky, because it is low maintenance and doesn't take long. Wanna give it a try? Read below for beginner friendly step by step instructions to get you on your way to growing your own food!

If you're ready to grow fresh, delicious lettuce as we do, a simple, low-maintenance system requires just a container, water, and nutrient solution. If you’re willing to invest a little more, affordable options, like the one we use, make it easy to jump in with everything you need. If you wanna check out the system that has brought us success and fresh, crisp lettuce, click here.
Why choose hydroponics? For one, it’s eco-friendly. Hydroponics uses up to 90% less water than traditional gardening. Plus, it’s space-efficient, perfect for apartments or homes with limited outdoor areas. And let’s be honest—there’s nothing quite as satisfying as picking your own lettuce or basil for dinner.
Whether you’re starting small with herbs or planning a larger setup for vegetables, hydroponics makes it easy to grow fresh, healthy food indoors. Dive into this sustainable, rewarding hobby and watch your garden—and your confidence—grow!
The Kratky Method:
Here's your shopping list:
5 gallon bucket
2. Compact drill/driver
3. Carbon hole saw with Mandrel 3"
4. 3" net pots
5. Hydroton
6. PH meter
7. PH Control kit
Step 1: Drill a hole in the lid large enough to hold the net pot
Step 2: Fill the bucket with water. You can use tap if you prefer as long as it isn't contaminated.
Step 3: Add in the hydroponic nutrients using the amount suggested on the box. Stir after you add each bottle.
Step 4: Time to check your PH level! You're aiming for 5.5-6.5. (If it exceeds the suggested PH level, use your PH control kit!)
Step 5: Place the lid back on the bucket. Put your net pot, growing media (Hydroton), and seedling gently into your drilled holes. Your water level in the bucket should touch some of the plant's roots but not fully submerge them.
Notes: Make sure your new Kratky hydroponic setup is protected from rapid changing temps, keep the lid on at all times unless inspecting water or roots, and ensure it is not in danger or being rained on as rain water can change your PH levels. This is a great beginner way to start small leafy plants until you're ready to advance!

Shattered Expectations and Renewed Hope: My Breastfeeding Story
Breastfeeding Isn’t the Most Natural Thing in the World—And That’s Okay
For many moms, breastfeeding doesn’t happen as effortlessly as we expect. My journey was filled with struggles, surprises, and hard lessons learned. From low supply to oversupply, I’ve experienced it all. If you’ve felt disappointed, defeated, or just plain exhausted, you’re not alone. Whether you’re breastfeeding, pumping, or formula-feeding, what matters most is that your baby is fed and loved. Read my story of perseverance, lessons learned, and encouragement for every mom on this journey. You’re doing great, mama!
Breastfeeding isn't the most natural thing in the world.
Breastfeeding doesn't come naturally to everyone. When I was about 6 months along with my first pregnancy, I started producing colostrum and leaking through my shirts. This was a complete surprise as nobody had told me this was possible. Because I was making colostrum already, I thought for sure I'd be a breastfeeding queen. After all, God blessed me with these excessive mounds that give me constant back pain and make bra shopping a traumatic experience so surely they must be worth it when it comes to breastfeeding, right? Wrong.
I had my baby in June of '20 and fully expected that when my milk came in, breastfeeding would come so naturally just as it had for all my friends. During the golden hour I attempted to latch my newborn and to my surprise, he took right to it! After that, it was all a struggle. He was visibly (and very audibly) frustrated at the lack of milk he was getting from me. But no problem, supplementing with formula would work. I'll request a visit with the lactation consultant and once my milk comes in, it'll be smooth sailing. Or so I thought.
Days turned to weeks and my milk was still not in. I tried the cookies, the vitamins, the drinks, and drinking so much water but as the days ticked by, I was feeling more and more defeated. I finally had to swallow my pride and admit that it wasn't going to happen for us.
A shot at redemption.
My second baby came along and again, I started producing colostrum very early. I didn't think much of it because of my prior experience but I was determined to at least give nursing another try. I wanted this so badly. To my surprise, my milk actually came in and it came in powerfully. Every let down I had during a nursing session ultimately choked my baby and basically water boarded him because he'd unlatch while coughing. I resorted to pumping instead and at four months old, my baby essentially out grew me. He was drinking 8 oz of milk at a time and I was producing about 2 oz. at most. When my supply had regulated, it seemed as though it dried up over night. No problem, I thought, I had given my oldest formula and he's a thriving and healthy baby boy.
Finally.
I had my third and last baby ten months ago. Following suit, I started producing colostrum early in my pregnancy. I prayed this would be a time I was successful in breastfeeding. It's my last baby, please let this work. My daughter latched so naturally the first time. Then the second. Then the third. My milk came in with a vengeance and I leaked nonstop every day all day (Thank you, Jesus, for milk catchers. Here are the amazing ones I used ---> click here ). I was determined to do what I needed to do to exclusively breastfeed. I pumped to help empty my breasts since my tiny preemie baby was eating such small amounts. Soon my freezer was full of milk and I was continuing to nurse. Our daughter is approaching her first birthday soon and our breastfeeding relationship is still strong! My past experiences with nursing changed with each baby I had.
I hope to share my story to encourage anyone who may be disappointed over not being able to breastfeed. I understand how you feel and I see you. Back then I beat myself up for months over not being able to give my oldest baby any milk and ya know what? It all turned out okay. He has a healthy attachment to me, a great immune system, and is so smart. He didn't have any deficits from being a formula baby. All the things we as moms are told will happen if our babies don't receive breastmilk, didn't happen. I know babies who were breastfed for the first year and are sick far more often than my formula babies.
My point is, if breastfeeding is your dream, don't give up on it if you aren't successful the first time around. Breastfeeding doesn't come naturally to all of us and that's okay.

Zone 9b’s February Garden Goldmine: Crops to Sow Now
February is the perfect time to kick off your gardening season in Zone 9b! With mild temperatures and longer days ahead, you can start growing a variety of fresh, vibrant crops. Leafy greens like lettuce and kale thrive in the cooler weather, while root veggies such as carrots and radishes are ready to take off. It’s also the perfect time to plant peas, herbs, and even start warm-season crops indoors for a head start on summer. Ready to dig in? Let’s talk about what to plant this month for a thriving garden!
What to Plant in Your Garden in February for Growing Zone 9b
If you’re in growing zone 9b like me, February is one of the best times to kick off your gardening season. The weather is starting to warm up just enough, and those mild days are perfect for getting things in the ground. I’ve been researching the best crops to grow right now, so let’s chat about what you can plant this month to set yourself up for a thriving garden.
Leafy Greens
If you love fresh salads, February is your moment. Lettuce, spinach, kale, and Swiss chard absolutely love the cool weather. Whether you’re sowing seeds directly or transplanting starts, these greens grow fast and don’t need a ton of maintenance. Plus, there’s nothing better than walking out to your garden and grabbing ingredients for dinner.

Root Vegetables
This is the time to plant carrots, radishes, beets, and turnips. These veggies are pretty chill about cooler soil temps, so they’ll grow well right now. Just make sure your soil is loose so the roots can stretch out and grow properly.
Brassicas
Broccoli, cauliflower, and cabbage thrive in the cooler weather we’re still having in February. If you have seedlings, get them in the ground. If not, it’s not too late to start some indoors. Pro tip: keep an eye on the weather, and if there’s a surprise frost, toss a row cover over them to keep them cozy.
Herbs
Cilantro, dill, and parsley are perfect to plant right now. I love having fresh herbs for cooking, and these grow quickly in the cooler temps. You can plant them in pots or straight into the garden.
Start Warm-Season Crops Indoors
Here’s where we get to dream about summer! February is a great time to start seeds indoors for tomatoes, peppers, and eggplants. Starting these now gives you a head start, and by the time the weather heats up, they’ll be ready to go in the garden. If you're interested in hydroponics, check out my other article How to Grow a Thriving Hydroponic Garden All Year.

Peas
If you’ve never grown peas, now’s the time to try. Snow peas and sugar snap peas love this weather and can be planted directly in the soil. They grow fast and will give you a delicious harvest before the summer heat takes over.
Flowers
And let’s not forget the beauty! February is perfect for planting cool-season flowers like pansies, snapdragons, and calendulas. Not only will they brighten up your garden, but they’ll also bring in pollinators to help with your veggies.
A Few Quick Tips for February Gardening
Prep Your Soil: Good soil is the foundation of a great garden. Mix in some compost to give your plants a nutrient boost.
Keep an Eye on Frost: While frosts are rare here, they can still happen. Be ready to cover your plants if the temps dip unexpectedly.
Water Smart: The rain can be hit or miss this time of year, so check your soil regularly and water when it’s dry.
Gardening in zone 9b in February feels like such a gift. There’s so much you can plant right now, and it’s the perfect time to dive into the growing season. I can’t wait to hear what you’re planting—let me know! Happy gardening!

The Ultimate Home Apothecary: 10 Healing Herbs You Need
If there’s one thing I’ve learned on my journey toward a more natural, self-sufficient lifestyle, it’s that having a home apothecary is a game-changer. Being able to support my family’s health with herbs that have been used for centuries feels both empowering and practical. From soothing sore throats with elderberry to calming anxious minds with chamomile, nature truly has our backs. Whether you’re new to herbal remedies or looking to stock up on essentials, these 10 healing herbs are must-haves for any home. Let’s dive into their incredible benefits and how to use them!
If there’s one thing I’ve learned on my journey toward a more natural, self-sufficient lifestyle, it’s that having a home apothecary is a game-changer. There is something so empowering about knowing you can support your family’s health with herbs that have been used for centuries. From calming anxious minds to soothing sore throats, nature truly has our backs.
If you’re new to herbal remedies (or just want to make sure your stash is stocked with the essentials), here are 10 must-have medicinal herbs—plus how to dry, store, and use them effectively.
Chamomile - The Gentle Soother
Best for: Anxiety, digestion, sleep, and inflammation
How to use: Brew into tea for relaxation or an upset tummy, or infuse into oil for a skin-soothing salve.
If you’re a mom, you probably already know the magic of chamomile tea. It’s my go-to for calming overtired kiddos and settling my own frazzled nerves at the end of the day. Plus, it’s great for soothing an upset stomach!
Peppermint - The Head Healer
Best for: Digestion, headaches, nausea, and congestion
How to use: Sip as a tea for bloating and nausea, inhale steam for sinus relief, or rub diluted peppermint oil on temples for headaches.
Peppermint is basically a superhero when it comes to my migraines. I have a roller ball I use to put just a bit on my temples and it's amazingly effective. If you want to try and make your own roller ball oils, check out this pack!
Echinacea – The Immune Booster
Best for: Strengthening immunity and fighting infections
How to use: Make a tincture or tea at the first sign of illness.
Whenever you feel a cold coming on, echinacea is the first thing to reach for. It helps kick your immune system into high gear so you can (hopefully) avoid getting sick in the first place!

Ginger – The Inflammation Fighter
Best for: Nausea, circulation, digestion, and inflammation
How to use: Make into tea for nausea or menstrual cramps, or infuse into honey for colds.
Ginger is one of those herbs that does everything. It’s incredible for nausea (morning sickness mamas, take note!), helps with period cramps, and has powerful anti-inflammatory benefits. Plus, ginger tea with honey is my favorite thing when I’m feeling under the weather.
Lavender – The Calming Wonder
Best for: Anxiety, sleep, burns, and skin irritation
How to use: Use in a tea for relaxation, infuse into oil for skin irritation, or add to bath water for stress relief.
Lavender is basically self-care in plant form. A cup of lavender tea before bed? Heavenly. Adding a few drops of lavender oil to a bath? Instant relaxation. It’s also my go-to for minor burns and bug bites!
Calendula – The Skin Healer
Best for: Wounds, skin irritation, and inflammation
How to use: Make into an infused oil or salve for cuts, rashes, and diaper rash.
Calendula is like nature’s Neosporin. It helps wounds heal faster, soothes irritated skin, and is gentle enough for babies (seriously, a calendula diaper cream is chef’s kiss).

Garlic - The Natural Antibiotic
Best for: Immune support, infections, and heart health
How to use: Eat raw for its antibacterial benefits, infuse in honey for colds, or make garlic oil for ear infections.
Garlic is nature’s antibiotic—and it actually works!
Lemon Balm – The Stress Reliever
Best for: Stress, digestion, and sleep
How to use: Brew into tea for relaxation, make a tincture for anxiety, or add fresh leaves to salads.
Lemon balm is an amazing herb for calming an anxious mind (yours and your kids’). It’s gentle, uplifting, and has the sweetest lemony scent.
Yarrow – The Fever Fighter
Best for: Fevers, wound healing, and circulation
How to use: Drink as a tea for fevers, apply a poultice to wounds, or use in a tincture.
Yarrow has been used for centuries to help bring down fevers naturally. It’s also a fantastic herb for minor cuts and scrapes—it actually helps stop bleeding!

Elderberry – The Cold & Flu Warrior
Best for: Preventing and treating colds and flu
How to use: Make elderberry syrup for daily immune support, or brew into tea.
Elderberry syrup is a staple during cold and flu season. You can take it daily to keep your immune system strong!
How to Dry & Store Your Herbs
Once you’ve gathered or bought your herbs, you’ll want to dry and store them properly so they last as long as possible. Here’s how:
Air Drying: Tie herbs in small bundles and hang them upside down in a dark, well-ventilated space.
Dehydrator: If you want to speed up the process, use a dehydrator on the lowest setting (95–115°F).
Oven Drying: Spread herbs on a baking sheet, set your oven to its lowest temp, and prop the door open slightly.
BEST WAY TO STORE DRIED HERBS:
Glass Jars: Mason jars work great, but keep them in a dark cabinet to prevent light damage.
Mylar Bags: These are best for long-term storage.
Label Everything: Trust me—once dried, herbs all start to look alike! Write the name and date on each container.
Stocking your home apothecary with these 10 herbs is a simple, powerful way to support your family’s health naturally. Whether you’re sipping chamomile tea for stress, rubbing lavender oil on a bug bite, or taking elderberry syrup to fight off a cold, these plants offer real, time-tested benefits.
Are you already using any of these herbs? Or is there one you’re excited to try? Let’s chat in the comments—I’d love to hear how you’re building your own natural medicine cabinet!
If you want to try to grow some of these indoors, check out my post How to Grow a Thriving Hydroponic Garden All Year.

The Sweetest Secret: How to Can Strawberry Jam Easily
Canning might seem intimidating, but making homemade strawberry jam is one of the easiest ways to start! With just a few simple ingredients and a water bath canner, you can create a delicious spread that’s perfect for toast, yogurt, or gifting to friends. This step-by-step guide will walk you through the process—from prepping your jars to hearing that satisfying pop of a perfect seal. In less than two hours, you’ll have a sweet, homemade jam that lasts all year. Ready to give it a try? Let’s get canning!
Whether you're deep in your homestead adventure or a newbie like me, an essential skill to learn is how to can. Canning is a practice dating back to the 18th century when Napoleon offered a reward of 12,000 francs for the invention of a new food preservation method. By 1903, Kerr, Mason, and Ball were household names, and Alexander Kerr was granted his patent for the two-piece disposable canning lid in 1915. I think a lot of fear surrounds the practice of canning because of the danger of botulism if canning isn't done correctly. But have no fear! Today we are just going over a beginner task, canning strawberry jam. This step-by-step guide will have you saying, "That was pretty easy!" in less than 2 hours. Here we go!

What You’ll Need
2 lbs of fresh strawberries (you can also use frozen)
4 cups of sugar
1/4 cup lemon juice (fresh or bottled)
1 packet (1.75 oz) powdered pectin-- OPTIONAL for a firmer jam
5-6 half-pint canning jars with lids and rings
Large pot
Deep stockpot or water bath canner
Ladle and funnel
Potato masher
Tongs or a jar lifter
Step 1: Jar Prep
You wanna wash your jars, lids and rings in hot, soapy water and rinse them well.
Then place your jars in a large pot of simmering (not boiling) water to keep them warm. This will help prevent your jars from cracking when you add hot jam. Hot jars. Hot jam.
Step 2: Strawberry Prep
Rinse your berries well and then hull (remove the green tops) and cut them into halves or quarters.
Use a potato masher to mash them until you reach your desired texture. This can be as chunky or smooth as you like.
Step 3: Let's Jam
In a large pot, combine your mashed strawberries, lemon juice, and pectin (if using). Stir well.
Heat over medium-high until it reaches a rolling boil (meaning the bubbles won't stop when you stir).
Add sugar all at once, stirring constantly. Bring back to a full rolling boil and let it continue to boil for 1 minute.
Remove from heat and skim off any foam with a spoon.
Step 4: Fill the Jars
Using a ladle and a funnel, fill each warm jar, leaving 1/4 inch of space at the top.
Wipe the jar rims with a clean, damp cloth to ensure a tight seal.
Place your lids on jars and screw the rings on fingertip tight (don't over-tighten them).
Step 5: Process in a Water Bath
Place your jars inside your deep stockpot or water bath canner.
Add enough hot water to cover the jars by a least 1 inch.
Bring the water to a gentle but steady boil and process the jars for 10 minutes (Adjust for altitude if needed).
Turn off the heat and let jars sit for another 5 minutes before removing.
Step 6: Cool and Store
Use a jar lifter (or tongs) to carefully remove jars and put them on a towel to cool undisturbed for 12-24 hours.
You should hear a satisfying pop as the lids seal.
Check the seals by pressing the center of each lid and if it doesn't flex, it's sealed!
Store your sealed jars in a cool, dark place for up to a year. If any jars didn't seal, refrigerate and enjoy within a few weeks!
Done!

That's it! So easy, right? You can spread it on toast, mix in yogurt, or gift it to a friend. Now that you see how easy it is, you'll want to try canning all kinds of goodies! When you wanna add it to your own homemade sourdough toast, check out my other post Sourdough Isn't Complicated. Here's What You Need to Know.

Sourdough Isn’t Complicated. Here’s What You Need to Know:
It seems as though sourdough is the newest wagon on which we are all eager to jump. Why wouldn’t we be? We have a never-ending supply of fresh-baked bread so long as we have flour. When I first got interested in the craze, I’ll admit, I was very intimidated. I’d heard the same horror stories you have about how the starters need to be babysat, it takes months to establish your starter and days to bake. But since I’m a stay-at-home mom, I figured, “Why not? I have the time to learn a new skill.” Here are the biggest doubts I had in the beginning and the reality of sourdough…
It seems as though sourdough is the newest wagon on which we are all eager to jump. Why wouldn’t we be? We have a never-ending supply of fresh-baked bread so long as we have flour. When I first got interested in the craze, I’ll admit, I was very intimidated. I’d heard the same horror stories you have about how the starters need to be babysat, it takes months to establish your starter and days to bake. But since I’m a stay-at-home mom, I figured, “Why not? I have the time to learn a new skill.” Here are the biggest doubts I had in the beginning and the reality of sourdough.

It takes months to establish a sourdough starter. Your starter should take around 5-7 days to establish from start to finish. However, depending on the temperature of your home, it could take up to around two-ish weeks. Warmer kitchens will have a faster fermentation time.
It takes days to bake a loaf. Some recipes do call for longer bulk fermentation time. Bulk fermentation is what gives the bread it’s flavor, volume, and texture. Many recipes can be done in a single day. Don’t give up the dream of having fresh, delicious bread because you’re afraid it might take a little time.
So much starter goes to waste during the discard process. It is essential to discard every day. Discarding makes sure your starter remains a maintainable size, the right amount of acidity, and maintains a healthy microbial balance and the discard doesn’t have to be wasted. There are sourdough geniuses out there who have discovered so many ways to put the discard to use by making it into pizza dough, cinnamon rolls, bagels, chocolate chip cookies, etc. Not only can you bake with the discard but if you can stomach tossing it out, it can be a healthy additive to your composter.
Starters must be babysat and fed everyday. If you don’t plan on using your sourdough everyday or every other day for baking, it can actually live in the fridge for up to two months without being fed. Some bakers would recommend not letting it exceed three weeks. Either way, as long as your starter hasn’t developed any type of mold on top, it’s good to wake up, feed and bake with.
I hope that debunking some of the myths you’ve probably heard kick-starts your curiosity about trying to get a starter of your own going. Establishing my own starter has been such a fun new skill I’ve learned and I would love for you to enjoy it too. I’ve listed some basic tools you’ll need below as well as a link to Amazon to make buying them super easy! Happy baking!
Shopping list:
–food scale (one that measures in grams)
-unbleached AP or bread flour. King Arthur has been my favorite thus far.
-a jar to store your starter in. Here’s a link to a great jar kit complete with a rising band, temperature gauge, and a silicone scraper!
I think I’m supposed to inform you that I do receive a small portion of any sale generated from these links. However, I won’t post a link for a product I wouldn’t recommend personally.
30 Homesteading Skills to Master for Ultimate Self-Sufficiency
I don’t know about you, but the more skills I learn, the more empowered I feel. Whether you dream of living off the land or just want to cut down on grocery trips and processed foods, building self-sufficiency skills is life-changing. The best part? You don’t need acres of land to start! Even in a small home or suburban backyard like ours, you can embrace homesteading principles and make life a little more sustainable.
Here are 30 essential skills that will help….
I don’t know about you, but the more skills I learn, the more empowered I feel. Whether you dream of living off the land or just want to cut down on grocery trips and processed foods, building self-sufficiency skills is life-changing. The best part? You don’t need acres of land to start! Even in a small home or suburban backyard like ours, you can embrace homesteading principles and make life a little more sustainable.
Here are 30 essential skills that will help you optimize your homestead and become more self-sufficient:
Food & Preservation Skills
Canning & Preserving – Water bath or pressure canning, pickling, and fermenting keep food shelf-stable and reduce waste. If you wanna start with an easy canning project, check out my post The Sweetest Secret: How to Can Strawberry Jam Easily.
Dehydrating – A great way to store fruits, veggies, and even meats for long-term use.
Vacuum Sealing – Keeps bulk food purchases fresh and prevents freezer burn. Here’s the sealer I got for a great price!
Foraging – Learn to identify edible plants and medicinal herbs in your area.
Making Homemade Bread – From scratch-baked loaves to sourdough, bread-making is a lost art that’s worth mastering.
Raising Chickens for Eggs & Meat – Even a small backyard can support a few hens for fresh eggs!
Growing Your Own Food – Start with easy crops like lettuce, tomatoes, and herbs before expanding.
Composting – Turn food scraps into nutrient-rich soil for your garden.
Saving Seeds – Learn how to collect and store seeds from your best crops for future planting.
Dairy Processing – Making butter, yogurt, and even cheese at home is easier than you think.
Water & Energy Conservation
Collecting Rainwater – A great way to reduce water bills and keep your garden thriving. This may not be permitted where you live so check your local laws.
Filtering & Purifying Water – Knowing how to purify water ensures your family always has safe drinking water.
Solar Cooking – Using the sun to cook meals saves electricity and is an amazing emergency preparedness skill.
Basic Solar Power Setup – Even small solar panels can supplement your energy needs.
Making DIY Candles – Useful for emergencies and creating a cozy home atmosphere.
Homemaking & DIY Essentials
Making Your Own Cleaning Products – Natural, non-toxic cleaners are better for your home and the environment.
Homemade Laundry Detergent – Saves money and avoids harsh chemicals.
Sewing & Mending Clothes – Being able to repair or upcycle clothing reduces waste.
Knitting or Crocheting – Great for making warm clothes, blankets, and gifts.
Making Handmade Soaps & Lotions – Control the ingredients for healthier skincare.
Building & Basic Carpentry – From chicken coops to raised garden beds, knowing how to work with wood is invaluable.
Emergency Preparedness & Survival Skills
Fire-Starting Without Matches – Essential for camping, emergencies, or off-grid living.
Basic First Aid & Herbal Remedies – Learn how to treat minor injuries and common ailments naturally.
Keeping a Well-Stocked Pantry – Having staples on hand means you can cook from scratch anytime.
Home Defense & Security – Protecting your home and family is part of self-sufficiency.
Animal Husbandry & Sustainable Living

Beekeeping – Bees not only provide honey but help pollinate your garden.
Raising Meat Rabbits or Quail – Small livestock options for meat production.
Processing Your Own Meat – Whether hunting, raising animals, or buying in bulk, knowing how to butcher and store meat is a useful skill.
Making Natural Fertilizers – Eggshells, banana peels, and compost tea are amazing for your plants!
Trading & Bartering Skills – Build a community where you exchange goods and skills instead of relying on stores. I recently bartered with a neighbor who has a beautiful Meyer lemon tree in her front yard. I needed lemons for making jam and offered to trade her a fresh sourdough loaf. Worked out beautifully for both of us!
Start Small & Keep Learning
Don’t feel like you need to master all of these skills overnight! Start with one or two that excite you and build from there. Homesteading and self-sufficiency aren’t about perfection—they’re about progress. Every new skill you learn brings you one step closer to independence, sustainability, and a deeper connection to your home and the world around you.
What self-sufficiency skills have you learned or want to try next? Let’s chat in the comments!

Busy Life, Strong Love: Simple Date Night Ideas for Every Couple
Life gets crazy, and let’s be real—date night often gets pushed to the back burner. But making time for each other doesn’t have to be complicated or expensive! Here are some simple but meaningful ideas to bring back the fun and connection, no matter how busy life gets….
Life gets crazy, and let’s be real—date night often gets pushed to the back burner. But making time for each other doesn’t have to be complicated or expensive! Here are some simple but meaningful ideas to bring back the fun and connection, no matter how busy life gets.
Cook Something New Together
Pick a recipe you’ve never tried, turn on some music, and get cooking side by side. Bonus points if you dress up and pretend you’re at a fancy restaurant—right in your own kitchen!
Stargazing & Sips
Lay out a cozy blanket, grab a glass of wine (or hot cocoa!), and just relax under the stars. Simple, sweet, and totally romantic.

Game Night Face-Off
Dust off those board games or challenge each other to a video game match. Loser does the dishes!
DIY Backyard Movie Night
Set up a projector (or just use a laptop), grab some blankets, and watch a classic movie under the stars. Don’t forget the popcorn!
Try a New Hobby Together
Pick something totally new—pottery, painting, or even a funny TikTok dance challenge. Learning together is a great way to bond and share some laughs.
Surprise Date Challenge
Each of you plans a secret date and surprises the other! It could be a themed dinner, a fun outing, or even a homemade scavenger hunt.

Love Notes & Memory Lane
Write each other a little love letter and take a walk down memory lane. Pull out old photos, reminisce, and remember why you fell in love in the first place. I’ve said it before, and I’ll say it again: love letters are a lost art. They need to make a comeback.
Unplug & Reconnect
Put the phones away, light some candles, and just enjoy being together—no distractions. Even a simple night in can feel extra special with the right atmosphere.
Spontaneous Mini Road Trip
Pick a random destination within a short drive and just go! Sometimes the best adventures are the unplanned ones.
The Ultimate Date Night In
Need even more fun and easy ideas? Check out my eBook 30 Date Night Ideas for Tired Parents—packed with creative ways to keep the spark alive, even when you’re totally exhausted!
Date nights don’t have to be fancy—they just need a little effort. Which one are you trying first? Let me know in the comments!