

What to Plant in March: A Nationwide Guide to Kickstart Your Garden
March is that sweet spot between winter and spring when the garden starts waking up, and it’s the perfect time to get your hands in the dirt. Whether you’re itching to start your veggie patch or want to add some color to your flower beds, what you plant now will set the tone for the growing season ahead. From cool-weather crops like leafy greens and peas to early flowers that thrive in the spring chill, here’s what to plant in March to give your garden a strong start.
March is the month when gardening truly starts to come alive! Whether you're in a frost-prone northern state or a mild southern climate, there are plenty of hardy vegetables, fruits, and herbs that can be planted now. No matter where you live, this guide will help you get your hands in the dirt and your garden growing!
Cold Climates (Zones 3–6): Cool-Weather Champs
If your ground is starting to thaw but frost is still possible, focus on frost-tolerant crops that thrive in cooler temperatures.
Vegetables:
Peas – One of the best early spring crops, peas can handle frost and thrive in cooler temperatures.
Carrots – Sow seeds directly into the soil for a sweet early summer harvest.
Radishes – Fast-growing and frost-hardy, radishes are a perfect first crop of the season.
Spinach & Lettuce – These greens thrive in cool weather and can handle light frosts.
Onions & Garlic – If you didn’t plant in the fall, early spring is your last chance for a good harvest.
Fruits & Herbs:
Strawberries – Get bare-root plants in the ground for summer berries.
Chives & Parsley – These cold-hardy herbs can withstand frosty nights and come back year after year.
Mild Climates (Zones 7–9): Transitioning to Warm Weather
Gardeners in these zones can start transitioning to warm-weather crops while still enjoying cool-season staples.
Vegetables:
Beets – Great for early spring planting, beets grow well in moderate temperatures.
Cabbage & Broccoli – These brassicas love the mild March temperatures.
Potatoes – Start your potatoes now for a late spring/early summer harvest.
Lettuce, Kale & Swiss Chard – Greens do well before summer heat sets in.
Tomatoes & Peppers (Start Indoors) – While it’s too early to plant outdoors, starting seeds inside now ensures strong plants later.
Fruits & Herbs:
Raspberries & Blackberries – Get your berry bushes in the ground now.
Thyme, Oregano & Cilantro – These herbs enjoy the mild spring temperatures.
Lemon Balm & Mint – Hardy and perfect for spring planting.
Warm & Tropical Climates (Zones 10–12): Time for Heat-Lovers
Gardeners in warm climates can take full advantage of early heat-loving crops.
Vegetables:
Tomatoes & Peppers – March is the perfect time to plant these warm-weather favorites.
Cucumbers – Get them in the ground now for a fast-growing, early summer crop.
Corn – If you have the space, plant corn now to harvest in early summer.
Eggplant & Okra – These crops thrive in the heat and do well when planted now.
Fruits & Herbs:
Melons – Cantaloupe and watermelon love warm soil and longer days.
Basil & Dill – These herbs thrive in warm temperatures and can be harvested throughout the season.
Avocado Trees – If you’ve been thinking about planting an avocado tree, now is a great time!
Container & Indoor Gardening: Anyone Can Grow!
If you're short on space or dealing with unpredictable weather, you can still grow fresh produce!
Lettuce, Spinach & Microgreens – Easy to grow in containers or indoors under grow lights.
Tomatoes & Peppers – Start these in pots to move outside when temperatures warm up.
Herbs (Basil, Cilantro, Thyme, & Mint) – Perfect for windowsills or patio pots.
Final Tips for March Gardening Success:
Check Your Frost Dates – Know when your area’s last frost date is before planting tender crops.
Start Seeds Indoors – Tomatoes, peppers, and eggplants need a head start in most climates.
Mulch & Protect Young Plants – Use row covers or mulch to shield plants from unexpected cold snaps.
Water Consistently – As temperatures warm, your plants will need more hydration.
Sign up for a FREE Seedtime Account - Seedtime uses your geographic location to find your grow zone and when to plant your seeds! If you want $5 in FREE seeds AND to try Seedtime for 30 days absolutely FREE, head to my post The Best Gardening App You Need.
March is an exciting month for gardeners, no matter where you live! Whether you’re sowing cold-hardy greens up north or starting tomatoes down south, there’s something for everyone to plant right now. What are you growing this March? Let me know in the comments!

Why Old-Fashioned Homemaking Skills Matter More Than Ever
In a world that moves at lightning speed, there’s something deeply grounding about old-fashioned homemaking skills. Knowing how to bake from scratch, grow your own food, and mend what’s broken isn’t just about nostalgia—it’s about self-sufficiency, resilience, and reclaiming a slower, more intentional way of living. These skills, once considered everyday knowledge, are making a comeback because they give us control over our homes, our health, and even our budgets. In an era of convenience, there’s power in knowing you don’t have to rely on store-bought everything.
Once upon a time, knowing how to bake a loaf of bread, sew a torn dress, or preserve the summer’s bounty was just a way of life. It wasn’t considered impressive or rare—it was simply what people did to care for their homes and families. But somewhere along the way, we traded those time-honored homemaking skills for convenience, fast food, and store-bought everything. And now? We’re starting to realize that maybe Grandma was onto something.
The truth is, old-fashioned homemaking skills are making a major comeback, and for good reason. From skyrocketing grocery prices to a desire for more sustainable, self-sufficient living, these skills are proving to be just as valuable—if not more so—than they were a hundred years ago. Let’s talk about why these traditional skills still matter and how they can enrich your life today.
1. Cooking from Scratch: A Healthier, Budget-Friendly Choice
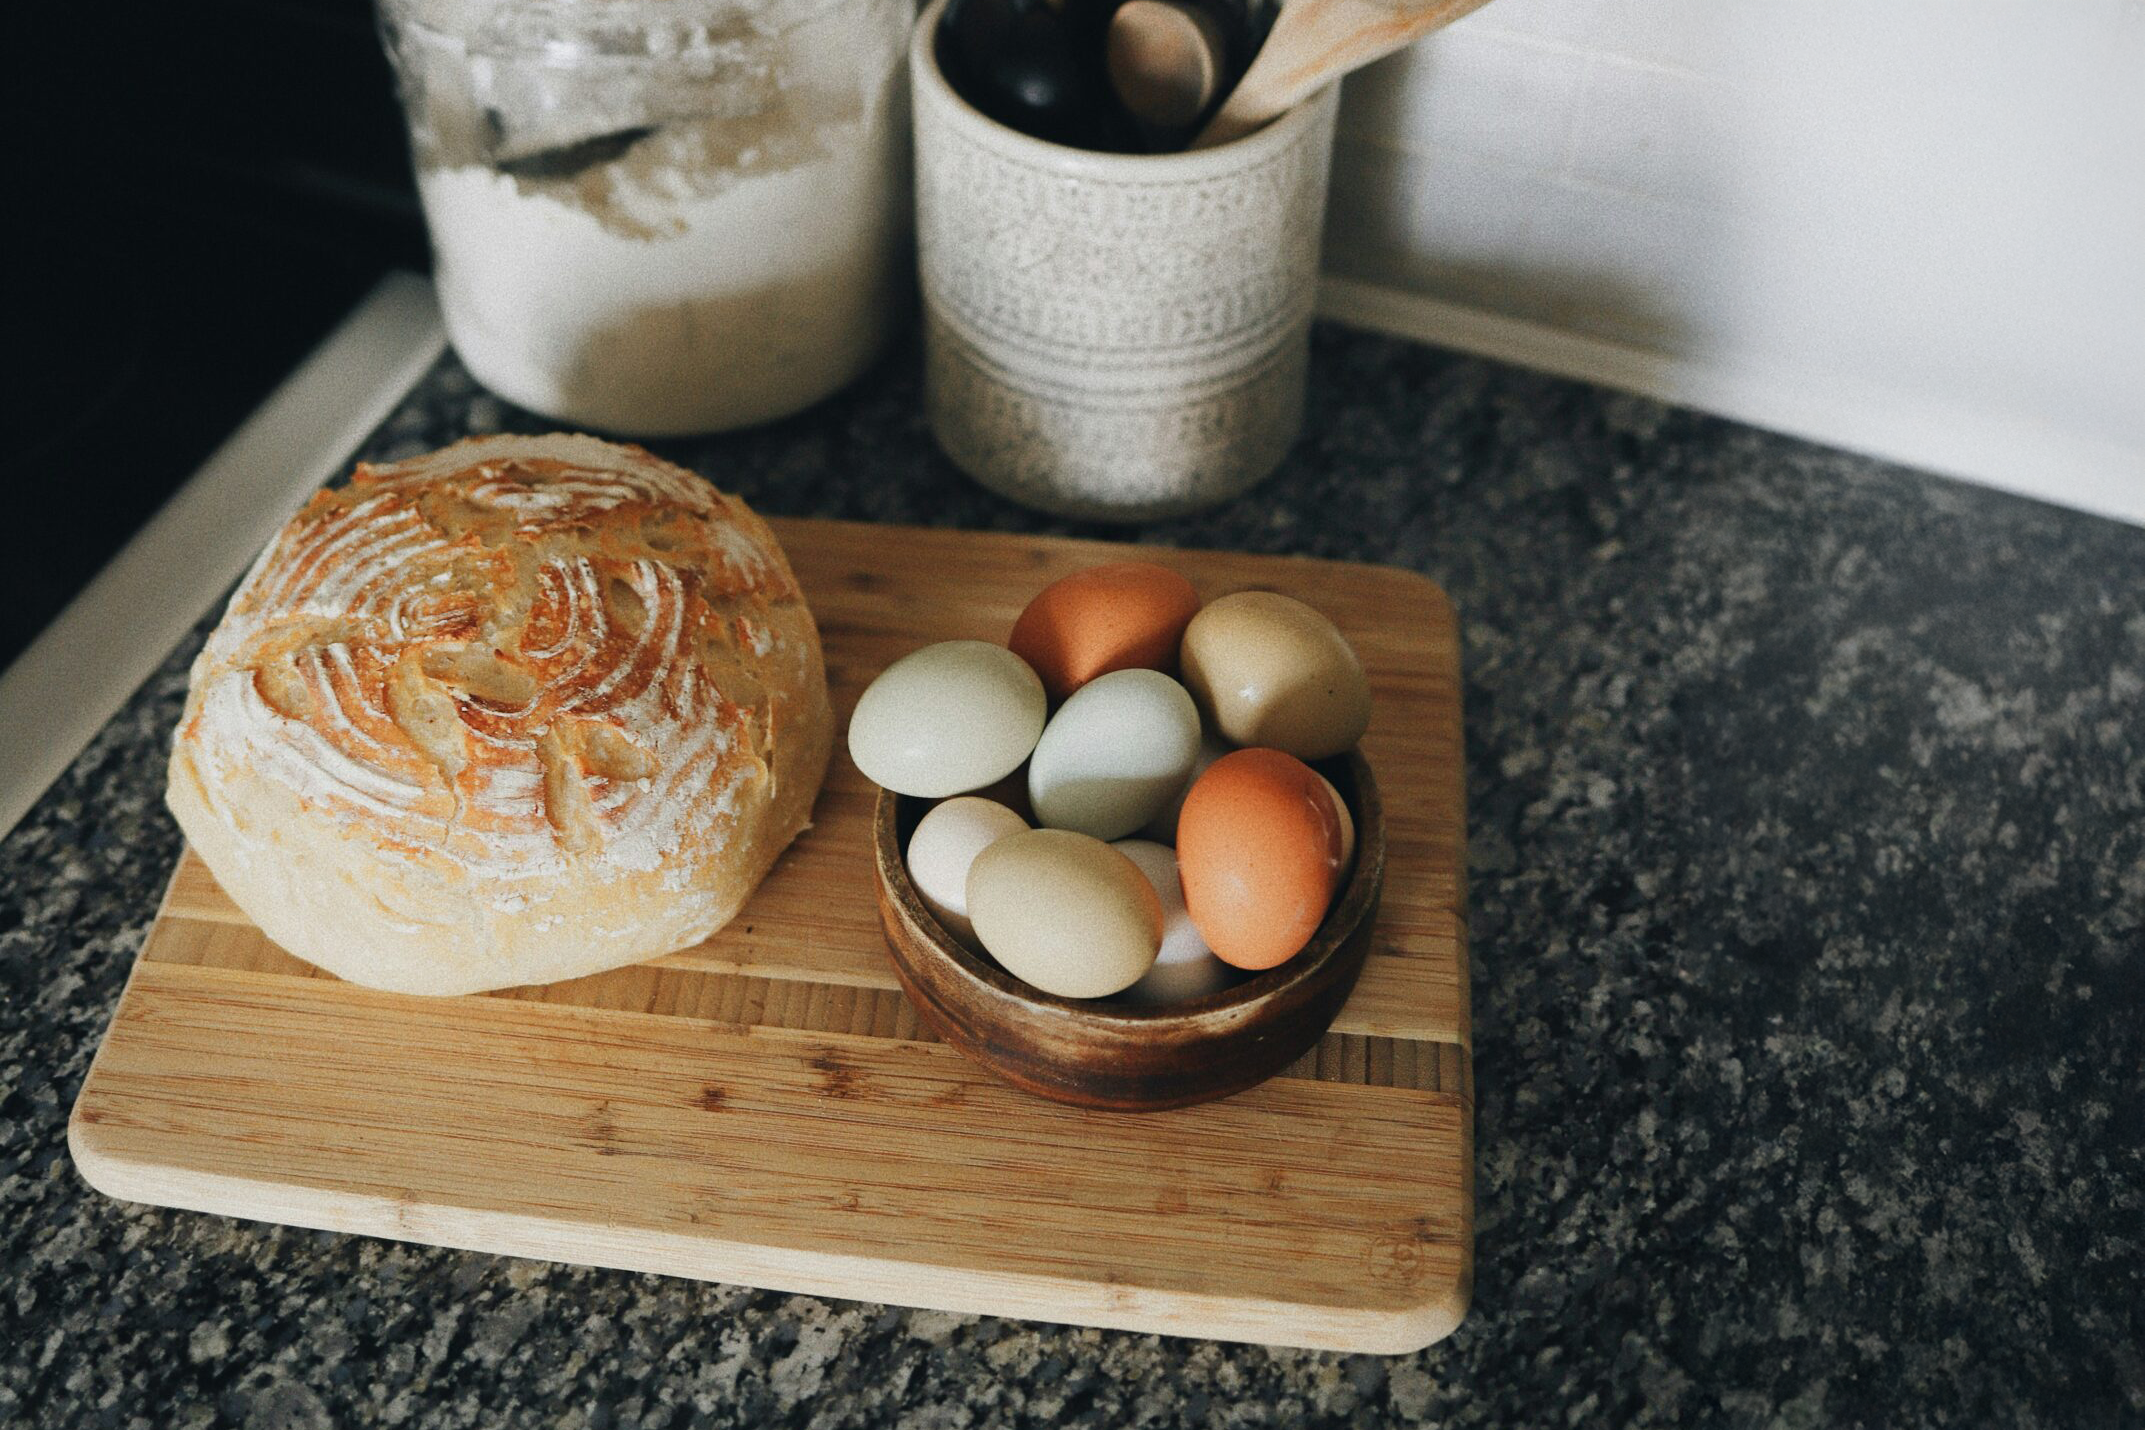
Processed foods have taken over our pantries, but learning how to cook from scratch is one of the most powerful homemaking skills you can have. Not only is homemade food more nutritious, but it’s also significantly cheaper in the long run. Baking your own bread, making yogurt, or whipping up homemade broth reduces your reliance on store-bought goods filled with preservatives and artificial ingredients.
How to Get Started: Start with something simple, like homemade muffins (I’ve got an amazing bulk muffin mix recipe!) or a batch of sourdough bread. Once you get comfortable, expand to making your own condiments, soups, and sauces.
2. Gardening: Grow Your Own Food, Save Money, and Eat Better
There’s something deeply satisfying about growing your own food. Whether you have a sprawling backyard garden or just a few potted herbs on a windowsill, growing even a small portion of your food helps cut grocery costs, reduces exposure to pesticides, and ensures your family has fresh, nutrient-dense produce.
Where to Start: Hardy vegetables like lettuce, radishes, and carrots are easy to grow for beginners. If you’re tight on space, try container gardening with herbs like basil, rosemary, and thyme. And if you really want to step up your game, check out Seedtime—my favorite garden planning app—to help you plan, plant, and harvest efficiently! Right now you can try Seedtime for FREE. Check that out here.

3. Food Preservation: No More Wasted Produce
Back in the day, throwing out food was unheard of. Families relied on canning, fermenting, dehydrating, and freezing to store their harvests for the months ahead. Today, food waste is a huge issue—but reviving these preservation techniques can help.
Simple Preservation Methods to Try:
Canning: Start with water-bath canning for jams, jellies, and pickles.
Fermenting: Homemade sauerkraut or kimchi is a probiotic-rich addition to your meals.
Dehydrating: Drying herbs, fruit, and even meats extends their shelf life without refrigeration.
4. Sewing and Mending: Slow Fashion at Its Finest
Fast fashion may be cheap, but it’s also wasteful. Clothes aren’t made to last anymore, and replacing them constantly can be expensive. Learning basic sewing skills—like mending holes, hemming pants, or even making your own clothes—saves money and keeps textiles out of landfills.
Beginner Sewing Tips: Invest in a simple sewing kit and start with hand-mending small holes or sewing on buttons. If you have access to a sewing machine, try making cloth napkins or pillowcases to practice before moving on to clothing repairs.
5. Homemaking as a Form of Self-Sufficiency
The more you know how to do for yourself, the less reliant you are on grocery stores, big-box retailers, and supply chains. That’s a powerful thing, especially in uncertain times. Knowing how to bake bread, grow a garden, or make homemade cleaning supplies means you’re better prepared for anything life throws your way.
6. The Joy of Slowing Down and Living Intentionally
One of the most beautiful things about traditional homemaking skills is that they force us to slow down. Kneading dough, planting seeds, or stitching a hem isn’t just productive—it’s meditative. In a world that’s constantly moving at full speed, these skills remind us to pause, enjoy the process, and take pride in what we create with our own hands.
Bringing It All Together: Start Small, But Start Somewhere
If you’re new to old-fashioned homemaking, don’t feel like you need to master everything at once. Pick one skill that excites you and give it a try. Maybe it’s learning to make your own bread, growing a few herbs on your porch (or in your flourishing hydroponics setup), or trying your hand at sewing. The more you learn, the more rewarding it becomes.
So, what old-fashioned homemaking skill are you most excited to bring back? Let’s chat in the comments—I’d love to hear what you’re working on!
And if you’re looking for more ways to simplify and enhance your homemaking journey, stick around—I’ve got plenty more tips, tricks, and recipes coming your way!

The Ultimate Guide to Rosemary: How to Grow, Harvest & Use This Incredible Herb
Rosemary isn’t just a fragrant herb—it’s a powerhouse in the kitchen, the garden, and even your self-care routine! From boosting memory to supporting hair growth, this hardy herb is as versatile as it is beneficial. Whether you're looking to grow your own rosemary, make homemade rosemary oil, or bake a loaf of rosemary-infused sourdough, this guide covers everything you need to know about this incredible plant.
If you’ve ever brushed against a rosemary plant in a garden, you know just how intoxicating that fresh, piney scent is. But rosemary isn’t just a pretty herb with a heavenly aroma—it’s a powerhouse in the kitchen, a secret weapon for natural beauty, and a go-to remedy for wellness. Whether you’re growing it at home, using it to elevate your homemade bread, or making rosemary water for hair growth, this guide will walk you through everything you need to know about this incredible herb.
What is Rosemary?
Rosemary (Salvia rosmarinus) is an evergreen shrub that belongs to the mint family. With needle-like leaves and a distinct, woodsy fragrance, this Mediterranean native has been cherished for centuries for both its culinary and medicinal properties. The name “rosemary” comes from the Latin words ros (dew) and marinus (sea), meaning “dew of the sea,” since it thrives in coastal climates.
Where Does Rosemary Grow Best?
If you want to grow rosemary, the good news is that it’s relatively low-maintenance! Here’s what it needs to thrive:
Sunlight: Rosemary loves full sun—at least 6-8 hours of direct sunlight per day.
Soil: It prefers well-draining soil, ideally sandy or loamy, to prevent root rot.
Watering: While it’s drought-tolerant once established, it still enjoys deep but infrequent watering.
Climate: Rosemary grows best in zones 7-10, but you can also grow it in a pot and bring it indoors in colder months.
Companion Plants: Rosemary pairs well with cabbage, beans, and carrots in the garden, as it helps deter pests.
How Long Does Rosemary Take to Harvest?
Patience is key when growing rosemary! It can take about 6-12 months to mature enough for a good harvest. However, you can start snipping small sprigs as soon as the plant is well-established. For the best flavor and potency, harvest in the morning when the oils are most concentrated.

The Benefits of Rosemary
Rosemary isn’t just another herb—it’s packed with amazing health benefits! Here are a few reasons to love it:
✅ Boosts Memory & Focus: Rosemary has been linked to improved cognitive function and may help with memory retention. ✅ Supports Hair Growth: Rosemary water and oil are known to stimulate hair follicles, promoting thicker, healthier hair. ✅ Anti-Inflammatory Properties: Its compounds help reduce inflammation, making it great for joint pain and sore muscles. ✅ Supports Digestion: Rosemary aids in digestion and can help alleviate bloating and indigestion. ✅ Rich in Antioxidants: Packed with antioxidants, rosemary helps fight free radicals and supports overall wellness.
Ways to Use Rosemary
1. Rosemary Water for Hair Growth
Rosemary has been used for centuries as a natural remedy for hair thinning and scalp health. Here’s how you can make your own rosemary water:
How to Make Rosemary Water:
Boil 2 cups of water and add a handful of fresh rosemary sprigs.
Let it simmer for 15-20 minutes until the water turns a deep amber color.
Allow it to cool, then strain the leaves out.
Pour into a spray bottle and use as a hair rinse 2-3 times a week to stimulate growth and strengthen hair.
✅ Tip: Store in the fridge and use within a week for freshness!
2. DIY Rosemary Oil
Rosemary-infused oil is a great multipurpose remedy for hair, skin, and cooking.
How to Make Rosemary Oil:
Fill a clean jar with fresh rosemary sprigs.
Cover with a carrier oil like olive oil or jojoba oil.
Let it sit in a warm spot for 2-4 weeks, shaking it occasionally.
Strain out the rosemary and store the oil in a dark glass bottle.
Use it for scalp massages, dry skin, or even drizzling over roasted veggies!
3. Rosemary in Baking (Try It in Bread!)
Nothing beats the smell of homemade rosemary bread fresh from the oven. Rosemary adds an earthy, savory depth to baked goods, and it pairs beautifully with garlic, olive oil, and sea salt.
Simple Rosemary Bread Recipe:
3 cups flour
1 tablespoon fresh rosemary, chopped
2 teaspoons salt
1 packet yeast
1 cup warm water
2 tablespoons olive oil
Mix, knead, let rise, and bake at 375°F for 25-30 minutes. Serve warm with butter!
4. Rosemary Tea for Digestion & Immunity
A cup of rosemary tea can work wonders for digestion, headaches, and stress relief.
How to Make Rosemary Tea:
Add 1-2 teaspoons of dried or fresh rosemary to a teapot.
Pour hot (not boiling) water over it and steep for 5-10 minutes.
Strain and enjoy with a touch of honey.
5. Medicinal Uses of Rosemary
Beyond cooking, rosemary has been used as a natural remedy for colds, sore muscles, and stress relief. Here’s how you can incorporate it into your routine:
Steam Inhalation: Add rosemary to boiling water and inhale the steam for clearer sinuses and respiratory relief.
Muscle Soak: Infuse rosemary in warm bathwater to soothe sore muscles.
Headache Relief: Rub diluted rosemary oil on temples for natural headache relief.
Final Thoughts: Why You Need Rosemary in Your Life
Whether you’re growing it in your garden, using it for hair growth, or baking it into fresh bread, rosemary is one of those herbs that belongs in every home. It’s easy to grow, packed with benefits, and has endless uses. If you haven’t already added rosemary to your routine, now’s the perfect time!
Do you love using rosemary? Let me know your favorite way to use it in the comments below! Happy gardening and happy herbal experimenting!

The Best Garden Planning App You Need (Try it for FREE!)
Garden planning just got way easier! If you've ever struggled with when to plant, what to plant, or how to keep track of it all, Seedtime is the ultimate garden planning app you need. It takes the guesswork out of scheduling, helps you map out your garden with ease, and even adjusts for your local frost dates. Whether you're a beginner or a seasoned gardener, Seedtime makes planning and managing your crops effortless. Ready to grow your most organized and productive garden yet? Let’s dive into why Seedtime is a total game-changer!
If you’ve ever felt overwhelmed trying to plan your garden, keep track of planting dates, or figure out the best time to start seeds—you're not alone. Garden planning can be a juggling act, especially if you want to maximize your harvest and grow food efficiently. That’s where Seedtime, the best garden planning app I’ve ever used, comes in.
This powerful tool takes the guesswork out of gardening, helping you plan, track, and optimize your planting schedule with ease. Whether you’re a seasoned gardener or just starting out, Seedtime makes it simple to create a well-organized, thriving garden. Let’s dive into why this app is a game-changer for gardeners!
Why Use a Garden Planning App?
Planning a garden isn’t as simple as just planting seeds and hoping for the best. You have to consider frost dates, spacing, succession planting, and even crop rotation. A good garden planner helps you:
Know exactly when to plant based on your growing zone
Keep track of seed starting, transplanting, and harvesting
Maximize space and yields with smart planning tools
Avoid common gardening mistakes like overcrowding or poor timing
What Makes Seedtime the Best Garden Planner?
Seedtime takes all these factors and simplifies them into an easy-to-use, visual planning tool that anyone can master. Here’s why I love it:

1. Custom Garden Plans for Your Growing Zone
One of the biggest challenges gardeners face is knowing when to start seeds. Seedtime automatically customizes your planting calendar based on your specific location and frost dates, so you always know the best time to start, transplant, and harvest.
2. Drag-and-Drop Visual Planner
This is one of my favorite features! Seedtime lets you drag and drop plants into a timeline, making it easy to see what needs to be planted when. It’s like having a personal garden coach laying out the perfect schedule for you.
3. Succession Planting Made Easy
Want a continuous harvest? Seedtime helps you space out plantings so you don’t end up with everything maturing at once. It’s the easiest way to keep your garden productive all season long.
4. Companion Planting and Crop Rotation Tools
Not sure which plants grow well together? The website (and app!) offers guidance on companion planting to help you make the most of your garden space while keeping pests away naturally. Plus, it helps you rotate crops each year to maintain soil health.
5. Access to a Huge Plant Database
No more guessing! Seedtime includes a massive database of fruits, vegetables, and herbs with specific growing details for each. Need to know how deep to plant your carrot seeds or how much spacing your tomatoes need? It’s all right there in the app.
6. Weather and Frost Date Integration
Seedtime pulls in real-time weather data to help you avoid unexpected frosts or heatwaves. This is a game-changer for gardeners who want to protect their crops and plan ahead.

7. Task Reminders and Notifications
If you’re like me, life gets busy, and sometimes you forget to plant or water on time. Seedtime sends reminders so you stay on track without the stress.
Who Should Use Seedtime?
Honestly, every gardener can benefit from using Seedtime. It’s perfect for:
Beginner gardeners who need help knowing when and how to plant
Experienced gardeners looking to fine-tune their schedules for maximum harvests
Homesteaders who want to grow food efficiently and track their planting history
Urban gardeners working with small spaces and limited growing windows
How to Get Started with Seedtime
Using Seedtime is super easy:
Sign up for an account and enter your growing zone.
Start planning your garden with the drag-and-drop interface.
Customize your schedule based on your planting preferences.
Follow reminders and enjoy a stress-free gardening experience!
Final Thoughts: Want to try Seedtime for FREE?
If you want to grow a thriving, well-organized garden without the overwhelm, Seedtime is absolutely worth it. It’s the ultimate garden planning tool that takes the stress out of when to plant, what to plant, and how to make the most of your growing season.
I highly recommend Seedtime to anyone who wants to take their garden to the next level. Try it out and see how much easier—and more rewarding—gardening can be! Seedtime has given my friends access to try Seedtime for FREE using these links. There are links to the basic AND unlimited subscriptions! Suh-weet! You can also use Seedtime to help grow a thriving hydroponic garden. Check out my other article - How to Grow a Thriving Hydroponic Garden All Year
Seedtime Basic Subscription: Basic Monthly - 30 Day Free Trial
Seedtime Unlimited Subscription: Unlimited Monthly - 30 Day Free Trial
Have you used Seedtime? Let me know in the comments how it has helped your garden planning! Happy growing!

How to Grow a Thriving Hydroponic Garden All Year
Want fresh, homegrown greens without the hassle of soil? Hydroponic gardening lets you grow herbs, lettuce, and even small fruits indoors—all while using 90% less water than traditional gardening. This beginner-friendly guide covers DIY hydroponic setups, the Kratky method, and must-know tips for year-round success. Whether you're working with a 5-gallon bucket or a full system, you’ll be harvesting crisp, delicious produce in no time! Read more and start growing today!
Looking for cheap hydroponic ideas? DIY enthusiasts can repurpose items like plastic tubs or Mason jars to create their own systems. It’s an incredibly cost-effective way to grow herbs, leafy greens, and even small fruits indoors. All you need is a sunny windowsill or some grow lights, and you’ll be harvesting fresh produce year-round. Many hydroponic beginners start with the Kratky method, named after the inventor Bernard Kratky, because it is low maintenance and doesn't take long. Wanna give it a try? Read below for beginner friendly step by step instructions to get you on your way to growing your own food!

If you're ready to grow fresh, delicious lettuce as we do, a simple, low-maintenance system requires just a container, water, and nutrient solution. If you’re willing to invest a little more, affordable options, like the one we use, make it easy to jump in with everything you need. If you wanna check out the system that has brought us success and fresh, crisp lettuce, click here.
Why choose hydroponics? For one, it’s eco-friendly. Hydroponics uses up to 90% less water than traditional gardening. Plus, it’s space-efficient, perfect for apartments or homes with limited outdoor areas. And let’s be honest—there’s nothing quite as satisfying as picking your own lettuce or basil for dinner.
Whether you’re starting small with herbs or planning a larger setup for vegetables, hydroponics makes it easy to grow fresh, healthy food indoors. Dive into this sustainable, rewarding hobby and watch your garden—and your confidence—grow!
The Kratky Method:
Here's your shopping list:
5 gallon bucket
2. Compact drill/driver
3. Carbon hole saw with Mandrel 3"
4. 3" net pots
5. Hydroton
6. PH meter
7. PH Control kit
Step 1: Drill a hole in the lid large enough to hold the net pot
Step 2: Fill the bucket with water. You can use tap if you prefer as long as it isn't contaminated.
Step 3: Add in the hydroponic nutrients using the amount suggested on the box. Stir after you add each bottle.
Step 4: Time to check your PH level! You're aiming for 5.5-6.5. (If it exceeds the suggested PH level, use your PH control kit!)
Step 5: Place the lid back on the bucket. Put your net pot, growing media (Hydroton), and seedling gently into your drilled holes. Your water level in the bucket should touch some of the plant's roots but not fully submerge them.
Notes: Make sure your new Kratky hydroponic setup is protected from rapid changing temps, keep the lid on at all times unless inspecting water or roots, and ensure it is not in danger or being rained on as rain water can change your PH levels. This is a great beginner way to start small leafy plants until you're ready to advance!

Zone 9b’s February Garden Goldmine: Crops to Sow Now
February is the perfect time to kick off your gardening season in Zone 9b! With mild temperatures and longer days ahead, you can start growing a variety of fresh, vibrant crops. Leafy greens like lettuce and kale thrive in the cooler weather, while root veggies such as carrots and radishes are ready to take off. It’s also the perfect time to plant peas, herbs, and even start warm-season crops indoors for a head start on summer. Ready to dig in? Let’s talk about what to plant this month for a thriving garden!
What to Plant in Your Garden in February for Growing Zone 9b
If you’re in growing zone 9b like me, February is one of the best times to kick off your gardening season. The weather is starting to warm up just enough, and those mild days are perfect for getting things in the ground. I’ve been researching the best crops to grow right now, so let’s chat about what you can plant this month to set yourself up for a thriving garden.
Leafy Greens
If you love fresh salads, February is your moment. Lettuce, spinach, kale, and Swiss chard absolutely love the cool weather. Whether you’re sowing seeds directly or transplanting starts, these greens grow fast and don’t need a ton of maintenance. Plus, there’s nothing better than walking out to your garden and grabbing ingredients for dinner.

Root Vegetables
This is the time to plant carrots, radishes, beets, and turnips. These veggies are pretty chill about cooler soil temps, so they’ll grow well right now. Just make sure your soil is loose so the roots can stretch out and grow properly.
Brassicas
Broccoli, cauliflower, and cabbage thrive in the cooler weather we’re still having in February. If you have seedlings, get them in the ground. If not, it’s not too late to start some indoors. Pro tip: keep an eye on the weather, and if there’s a surprise frost, toss a row cover over them to keep them cozy.
Herbs
Cilantro, dill, and parsley are perfect to plant right now. I love having fresh herbs for cooking, and these grow quickly in the cooler temps. You can plant them in pots or straight into the garden.
Start Warm-Season Crops Indoors
Here’s where we get to dream about summer! February is a great time to start seeds indoors for tomatoes, peppers, and eggplants. Starting these now gives you a head start, and by the time the weather heats up, they’ll be ready to go in the garden. If you're interested in hydroponics, check out my other article How to Grow a Thriving Hydroponic Garden All Year.

Peas
If you’ve never grown peas, now’s the time to try. Snow peas and sugar snap peas love this weather and can be planted directly in the soil. They grow fast and will give you a delicious harvest before the summer heat takes over.
Flowers
And let’s not forget the beauty! February is perfect for planting cool-season flowers like pansies, snapdragons, and calendulas. Not only will they brighten up your garden, but they’ll also bring in pollinators to help with your veggies.
A Few Quick Tips for February Gardening
Prep Your Soil: Good soil is the foundation of a great garden. Mix in some compost to give your plants a nutrient boost.
Keep an Eye on Frost: While frosts are rare here, they can still happen. Be ready to cover your plants if the temps dip unexpectedly.
Water Smart: The rain can be hit or miss this time of year, so check your soil regularly and water when it’s dry.
Gardening in zone 9b in February feels like such a gift. There’s so much you can plant right now, and it’s the perfect time to dive into the growing season. I can’t wait to hear what you’re planting—let me know! Happy gardening!

The Ultimate Home Apothecary: 10 Healing Herbs You Need
If there’s one thing I’ve learned on my journey toward a more natural, self-sufficient lifestyle, it’s that having a home apothecary is a game-changer. Being able to support my family’s health with herbs that have been used for centuries feels both empowering and practical. From soothing sore throats with elderberry to calming anxious minds with chamomile, nature truly has our backs. Whether you’re new to herbal remedies or looking to stock up on essentials, these 10 healing herbs are must-haves for any home. Let’s dive into their incredible benefits and how to use them!
If there’s one thing I’ve learned on my journey toward a more natural, self-sufficient lifestyle, it’s that having a home apothecary is a game-changer. There is something so empowering about knowing you can support your family’s health with herbs that have been used for centuries. From calming anxious minds to soothing sore throats, nature truly has our backs.
If you’re new to herbal remedies (or just want to make sure your stash is stocked with the essentials), here are 10 must-have medicinal herbs—plus how to dry, store, and use them effectively.
Chamomile - The Gentle Soother
Best for: Anxiety, digestion, sleep, and inflammation
How to use: Brew into tea for relaxation or an upset tummy, or infuse into oil for a skin-soothing salve.
If you’re a mom, you probably already know the magic of chamomile tea. It’s my go-to for calming overtired kiddos and settling my own frazzled nerves at the end of the day. Plus, it’s great for soothing an upset stomach!
Peppermint - The Head Healer
Best for: Digestion, headaches, nausea, and congestion
How to use: Sip as a tea for bloating and nausea, inhale steam for sinus relief, or rub diluted peppermint oil on temples for headaches.
Peppermint is basically a superhero when it comes to my migraines. I have a roller ball I use to put just a bit on my temples and it's amazingly effective. If you want to try and make your own roller ball oils, check out this pack!
Echinacea – The Immune Booster
Best for: Strengthening immunity and fighting infections
How to use: Make a tincture or tea at the first sign of illness.
Whenever you feel a cold coming on, echinacea is the first thing to reach for. It helps kick your immune system into high gear so you can (hopefully) avoid getting sick in the first place!

Ginger – The Inflammation Fighter
Best for: Nausea, circulation, digestion, and inflammation
How to use: Make into tea for nausea or menstrual cramps, or infuse into honey for colds.
Ginger is one of those herbs that does everything. It’s incredible for nausea (morning sickness mamas, take note!), helps with period cramps, and has powerful anti-inflammatory benefits. Plus, ginger tea with honey is my favorite thing when I’m feeling under the weather.
Lavender – The Calming Wonder
Best for: Anxiety, sleep, burns, and skin irritation
How to use: Use in a tea for relaxation, infuse into oil for skin irritation, or add to bath water for stress relief.
Lavender is basically self-care in plant form. A cup of lavender tea before bed? Heavenly. Adding a few drops of lavender oil to a bath? Instant relaxation. It’s also my go-to for minor burns and bug bites!
Calendula – The Skin Healer
Best for: Wounds, skin irritation, and inflammation
How to use: Make into an infused oil or salve for cuts, rashes, and diaper rash.
Calendula is like nature’s Neosporin. It helps wounds heal faster, soothes irritated skin, and is gentle enough for babies (seriously, a calendula diaper cream is chef’s kiss).

Garlic - The Natural Antibiotic
Best for: Immune support, infections, and heart health
How to use: Eat raw for its antibacterial benefits, infuse in honey for colds, or make garlic oil for ear infections.
Garlic is nature’s antibiotic—and it actually works!
Lemon Balm – The Stress Reliever
Best for: Stress, digestion, and sleep
How to use: Brew into tea for relaxation, make a tincture for anxiety, or add fresh leaves to salads.
Lemon balm is an amazing herb for calming an anxious mind (yours and your kids’). It’s gentle, uplifting, and has the sweetest lemony scent.
Yarrow – The Fever Fighter
Best for: Fevers, wound healing, and circulation
How to use: Drink as a tea for fevers, apply a poultice to wounds, or use in a tincture.
Yarrow has been used for centuries to help bring down fevers naturally. It’s also a fantastic herb for minor cuts and scrapes—it actually helps stop bleeding!

Elderberry – The Cold & Flu Warrior
Best for: Preventing and treating colds and flu
How to use: Make elderberry syrup for daily immune support, or brew into tea.
Elderberry syrup is a staple during cold and flu season. You can take it daily to keep your immune system strong!
How to Dry & Store Your Herbs
Once you’ve gathered or bought your herbs, you’ll want to dry and store them properly so they last as long as possible. Here’s how:
Air Drying: Tie herbs in small bundles and hang them upside down in a dark, well-ventilated space.
Dehydrator: If you want to speed up the process, use a dehydrator on the lowest setting (95–115°F).
Oven Drying: Spread herbs on a baking sheet, set your oven to its lowest temp, and prop the door open slightly.
BEST WAY TO STORE DRIED HERBS:
Glass Jars: Mason jars work great, but keep them in a dark cabinet to prevent light damage.
Mylar Bags: These are best for long-term storage.
Label Everything: Trust me—once dried, herbs all start to look alike! Write the name and date on each container.
Stocking your home apothecary with these 10 herbs is a simple, powerful way to support your family’s health naturally. Whether you’re sipping chamomile tea for stress, rubbing lavender oil on a bug bite, or taking elderberry syrup to fight off a cold, these plants offer real, time-tested benefits.
Are you already using any of these herbs? Or is there one you’re excited to try? Let’s chat in the comments—I’d love to hear how you’re building your own natural medicine cabinet!
If you want to try to grow some of these indoors, check out my post How to Grow a Thriving Hydroponic Garden All Year.
30 Homesteading Skills to Master for Ultimate Self-Sufficiency
I don’t know about you, but the more skills I learn, the more empowered I feel. Whether you dream of living off the land or just want to cut down on grocery trips and processed foods, building self-sufficiency skills is life-changing. The best part? You don’t need acres of land to start! Even in a small home or suburban backyard like ours, you can embrace homesteading principles and make life a little more sustainable.
Here are 30 essential skills that will help….
I don’t know about you, but the more skills I learn, the more empowered I feel. Whether you dream of living off the land or just want to cut down on grocery trips and processed foods, building self-sufficiency skills is life-changing. The best part? You don’t need acres of land to start! Even in a small home or suburban backyard like ours, you can embrace homesteading principles and make life a little more sustainable.
Here are 30 essential skills that will help you optimize your homestead and become more self-sufficient:
Food & Preservation Skills
Canning & Preserving – Water bath or pressure canning, pickling, and fermenting keep food shelf-stable and reduce waste. If you wanna start with an easy canning project, check out my post The Sweetest Secret: How to Can Strawberry Jam Easily.
Dehydrating – A great way to store fruits, veggies, and even meats for long-term use.
Vacuum Sealing – Keeps bulk food purchases fresh and prevents freezer burn. Here’s the sealer I got for a great price!
Foraging – Learn to identify edible plants and medicinal herbs in your area.
Making Homemade Bread – From scratch-baked loaves to sourdough, bread-making is a lost art that’s worth mastering.
Raising Chickens for Eggs & Meat – Even a small backyard can support a few hens for fresh eggs!
Growing Your Own Food – Start with easy crops like lettuce, tomatoes, and herbs before expanding.
Composting – Turn food scraps into nutrient-rich soil for your garden.
Saving Seeds – Learn how to collect and store seeds from your best crops for future planting.
Dairy Processing – Making butter, yogurt, and even cheese at home is easier than you think.
Water & Energy Conservation
Collecting Rainwater – A great way to reduce water bills and keep your garden thriving. This may not be permitted where you live so check your local laws.
Filtering & Purifying Water – Knowing how to purify water ensures your family always has safe drinking water.
Solar Cooking – Using the sun to cook meals saves electricity and is an amazing emergency preparedness skill.
Basic Solar Power Setup – Even small solar panels can supplement your energy needs.
Making DIY Candles – Useful for emergencies and creating a cozy home atmosphere.
Homemaking & DIY Essentials
Making Your Own Cleaning Products – Natural, non-toxic cleaners are better for your home and the environment.
Homemade Laundry Detergent – Saves money and avoids harsh chemicals.
Sewing & Mending Clothes – Being able to repair or upcycle clothing reduces waste.
Knitting or Crocheting – Great for making warm clothes, blankets, and gifts.
Making Handmade Soaps & Lotions – Control the ingredients for healthier skincare.
Building & Basic Carpentry – From chicken coops to raised garden beds, knowing how to work with wood is invaluable.
Emergency Preparedness & Survival Skills
Fire-Starting Without Matches – Essential for camping, emergencies, or off-grid living.
Basic First Aid & Herbal Remedies – Learn how to treat minor injuries and common ailments naturally.
Keeping a Well-Stocked Pantry – Having staples on hand means you can cook from scratch anytime.
Home Defense & Security – Protecting your home and family is part of self-sufficiency.
Animal Husbandry & Sustainable Living

Beekeeping – Bees not only provide honey but help pollinate your garden.
Raising Meat Rabbits or Quail – Small livestock options for meat production.
Processing Your Own Meat – Whether hunting, raising animals, or buying in bulk, knowing how to butcher and store meat is a useful skill.
Making Natural Fertilizers – Eggshells, banana peels, and compost tea are amazing for your plants!
Trading & Bartering Skills – Build a community where you exchange goods and skills instead of relying on stores. I recently bartered with a neighbor who has a beautiful Meyer lemon tree in her front yard. I needed lemons for making jam and offered to trade her a fresh sourdough loaf. Worked out beautifully for both of us!
Start Small & Keep Learning
Don’t feel like you need to master all of these skills overnight! Start with one or two that excite you and build from there. Homesteading and self-sufficiency aren’t about perfection—they’re about progress. Every new skill you learn brings you one step closer to independence, sustainability, and a deeper connection to your home and the world around you.
What self-sufficiency skills have you learned or want to try next? Let’s chat in the comments!